
You can install IIS (Internet Information Services) on Windows Server using Server Manager by following the steps below:
1. Server Preparation:
— Make sure you have Administrator privileges on your server if you are using a Windows Server operating system.
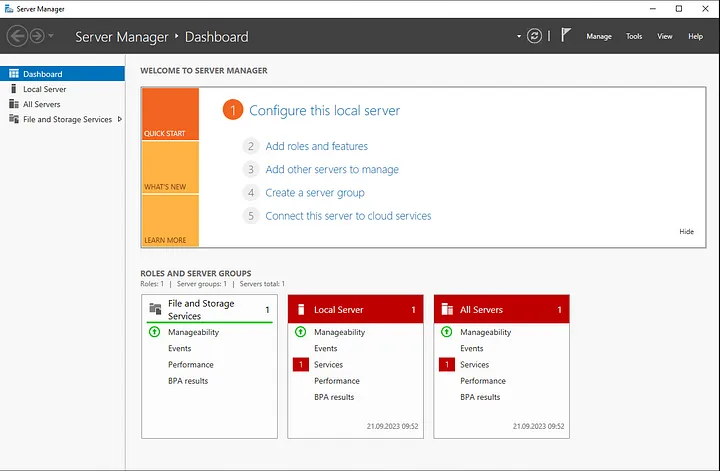
2. Opening Server Manager:
— Click on the Start button.
 — Search for “Server Manager” and open it.
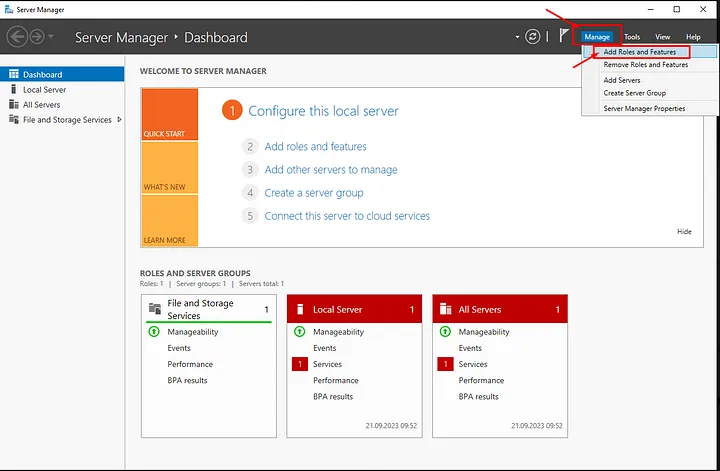
3. Select “Add Roles and Features” from the Left Menu:
— In the Server Manager main window, locate “Upper Banners” and select “Add Roles and Features.”
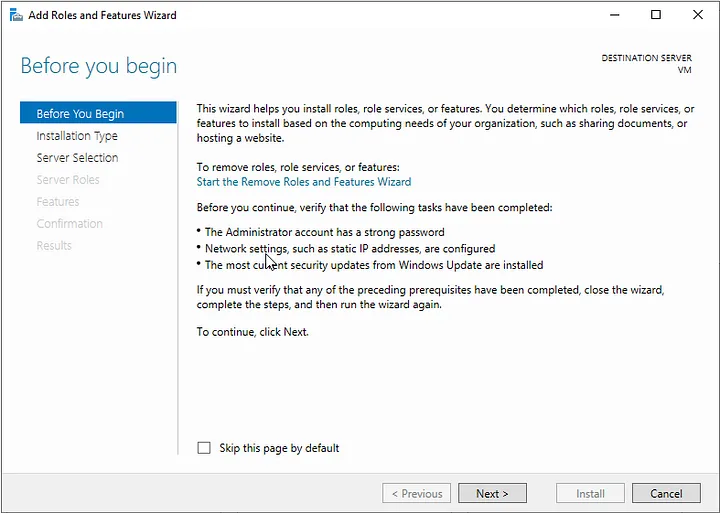
4. Launch the “Add Roles and Features Wizard”:
— The “Add Roles and Features Wizard” window will open. This wizard helps you add roles and features to your server.
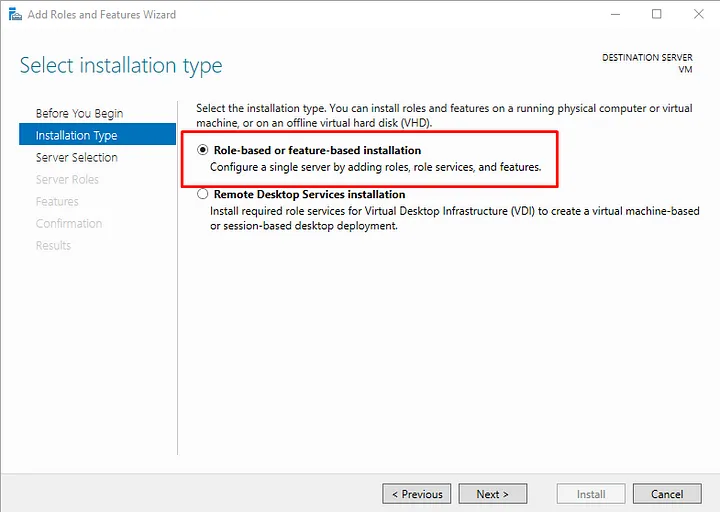
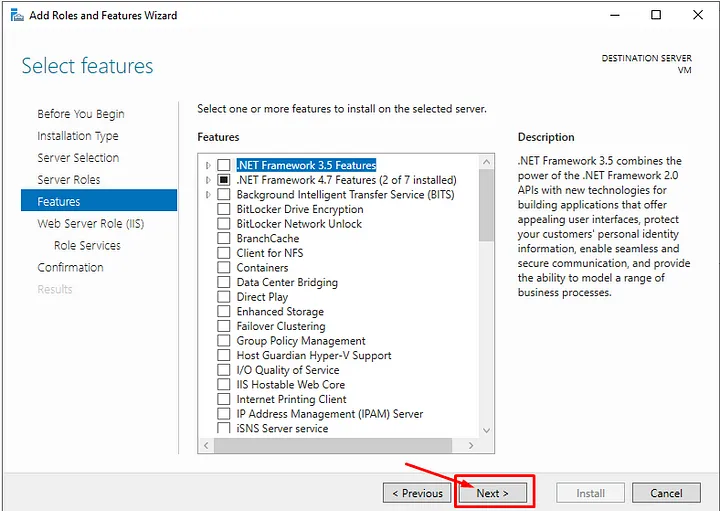
5. Select Features:
— In the first step of the wizard, choose the “Installation Type.” Typically, select “Role-based or feature-based installation,” and proceed.
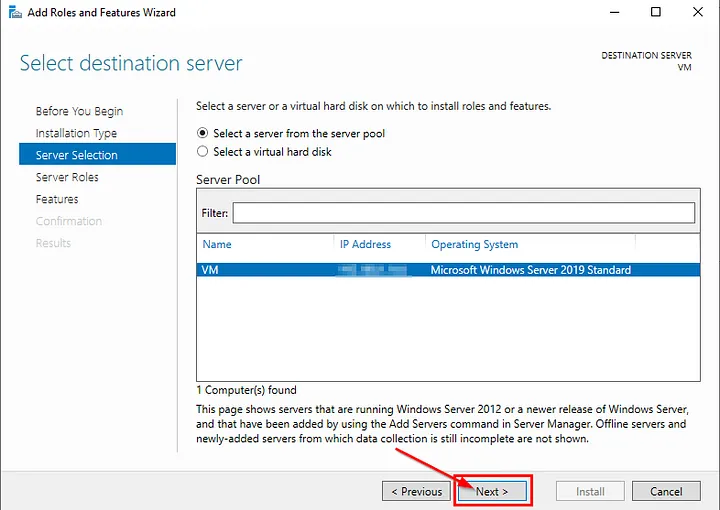
6. Choose the Target Server:
— Select your server or specify the target server, then click “Next.”
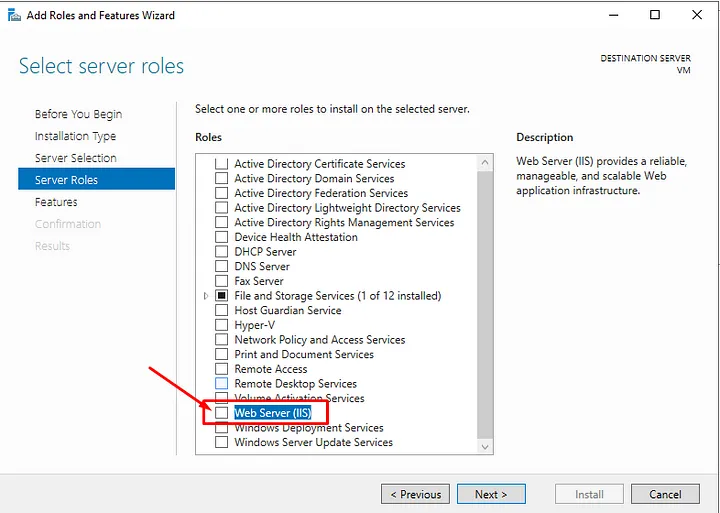
7. Select Roles:
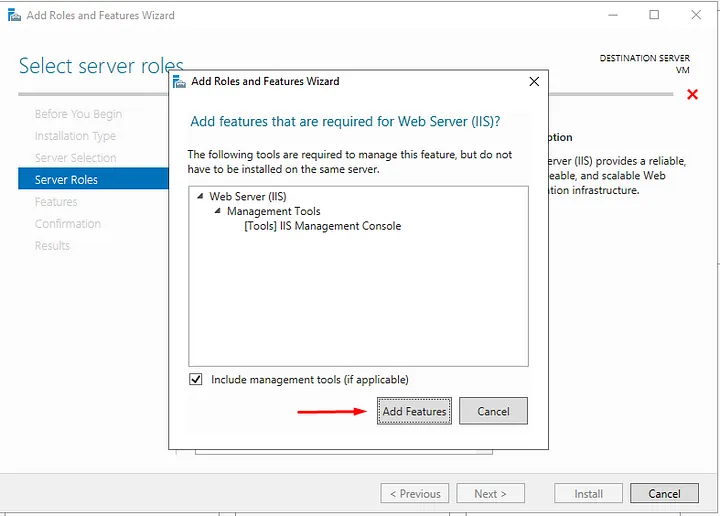
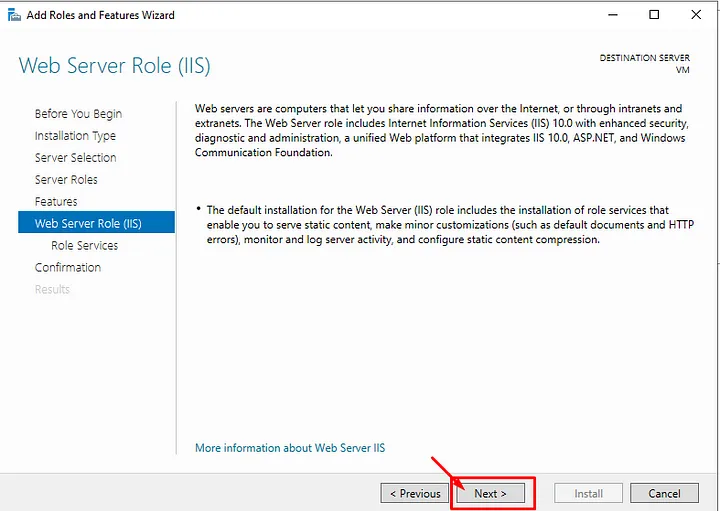
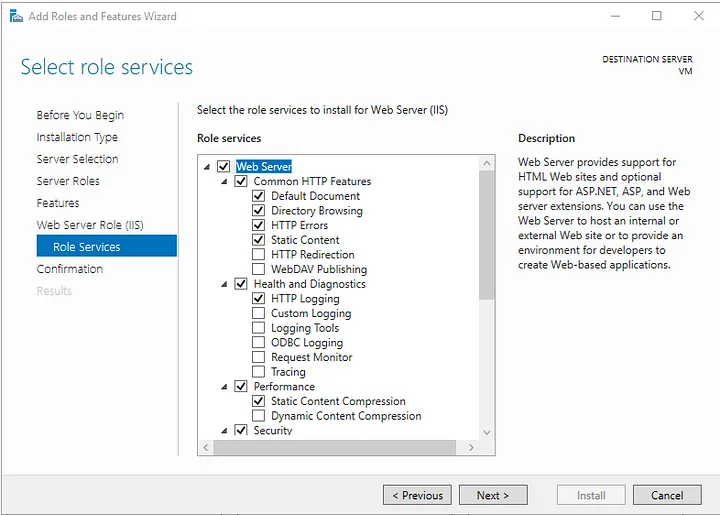
— In the “Roles” section, find “Web Server (IIS)” and check the box. You can also select additional components if needed.
8. Review Accessibility Information:
— Follow the wizard’s progression and configure necessary options when prompted.
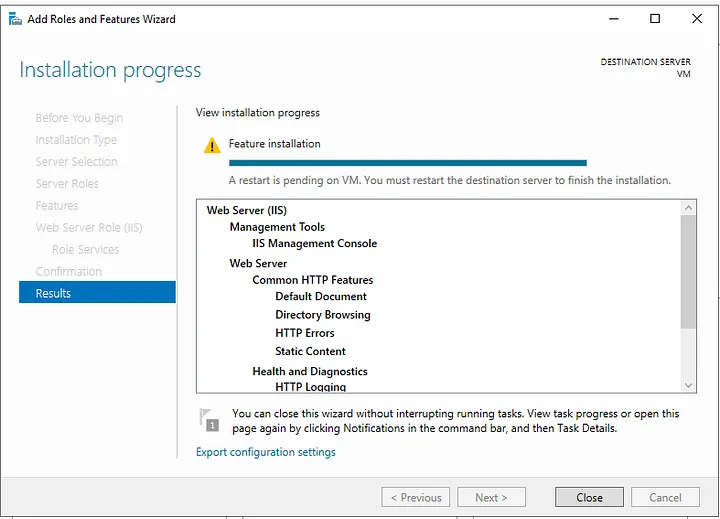
9. Initiate the Installation:
— Start the IIS installation by clicking the “Install” button.

10. Completion of Installation:
— Once the installation is complete, you will receive a confirmation message indicating successful installation.You will then be prompted for a reboot.
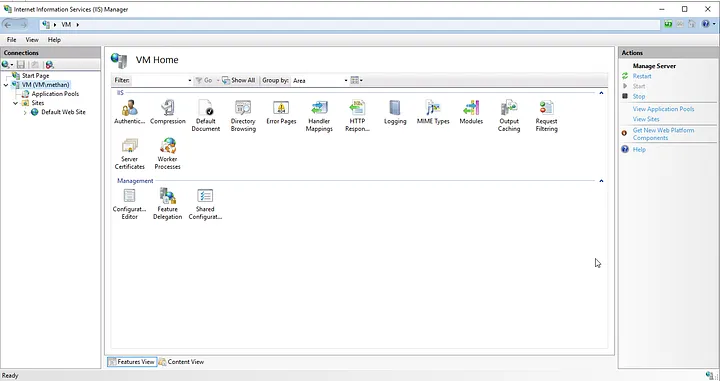
You can successfully install IIS by following these steps. Afterward, you can configure your websites and applications using the IIS Management Console.
If you have any questions or details you would like to add, feel free to write me.