
“rclone” is a command-line based tool that allows interaction with various cloud storage providers (such as Google Drive, Dropbox, Amazon S3, Microsoft OneDrive, etc.) and helps synchronize data across these storage spaces. Here are some of the use cases for rclone:
- Cloud Storage Synchronization: rclone can be used to synchronize or back up files between different cloud storage providers. For instance, you can synchronize files from your computer to Google Drive or Dropbox.
- Backup and Recovery: rclone can be utilized to back up important data to cloud storage. This simplifies the process of recovering files in case of data loss.
- Data Movement and Transfer: When you need to move large files or datasets between different cloud storage providers, rclone can come in handy.
- Remote File Management: Through the command-line interface, rclone enables you to manage files in remote cloud storage accounts. You can delete, move, or rename files and folders.
- Multi-Account Management: When dealing with multiple cloud storage provider accounts, rclone can help manage them. This makes it easy to switch between different accounts.
- Script Automation: You can automate rclone commands and create scripts to perform automatic backups or synchronizations based on a specific schedule.
- Data Analysis and Processing: rclone can be integrated with other tools used for data analysis or processing. For example, you can pull and process data and then store the results in cloud storage.
- Large Data Transfer: When transferring large datasets between different cloud storage providers, rclone ensures fast and reliable data transfer.
- Server Backup: You can use rclone to back up server data to cloud storage spaces.
- Data Sharing: With rclone, you can share your cloud storage spaces with others, which can be useful for collaboration purposes.
In summary, rclone is a versatile tool that finds application in a wide range of scenarios including data synchronization, backup, data movement, and management of cloud storage accounts.
Installation of rclone
Step 1: Prepare the Required Tools
Before installing rclone, you’ll need a command-line environment to work with through the terminal.
- On Linux or macOS, open the Terminal application.
- On Windows, open PowerShell or Command Prompt.
Step 2: Download rclone
You can download rclone from the official website. Choose the version suitable for your operating system (Windows, macOS, Linux) and download it.
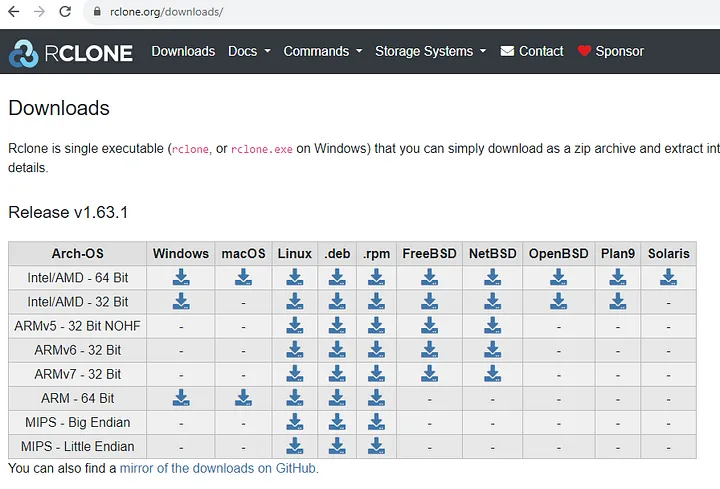
rclone download - Sizin için uygun olan sürümü (örneğin, Windows, macOS veya Linux) seçin ve indirin.
Step 3: Installation and Configuration of rclone
Extract the downloaded rclone file and move the files to an appropriate location (e.g., /usr/local/bin on macOS and Linux, C:\Windows\System32 on Windows).
Step 4: rclone Configuration
Before you start using rclone, you need to configure your cloud storage accounts. Open the terminal or command prompt. To initiate the rclone configuration, use the following command:
rclone config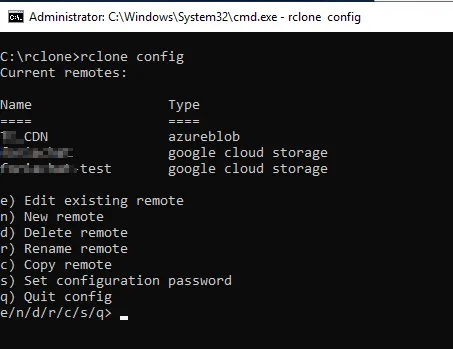
Follow the on-screen instructions to add and configure your cloud storage accounts. You’ll complete steps such as OAuth2 authentication or other identity verification methods depending on the cloud service you’re using.
Once configuration is complete, you can save it with a chosen name.
Step 5: Using rclone
rclone offers great flexibility in its usage. For example, to upload a file from your local disk to a cloud storage account:
rclone copy /path/to/local/file remote: destination/folderHere, replace /path/to/local/file with the local file’s path, remote with the name you configured for the cloud storage, and destination/folder with the target folder in the cloud storage account.
To sum up, by following these steps, you can start using rclone to easily synchronize, backup, move, and share your data across different cloud storage providers.
If you have any questions or details you would like to add, feel free to write me.