Categories
Articles Backups SQL

How many types of backups can be taken in SQL Server?

In SQL Server, backups are typically taken in four different types:

  1. Full Backup
  2. Differential Backup
  3. Transaction Log Backup
  4. File or Filegroup Backup

Let’s delve into the details of each type of backup in SQL Server:
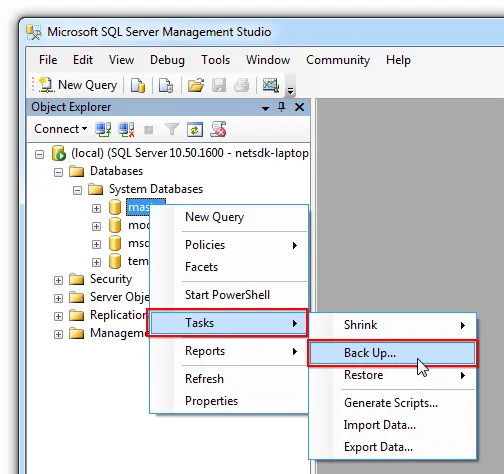
1.Full Backup:

  • Description: A complete backup of the entire database.
  • Purpose: Provides a baseline for a complete restore of the database in case of a failure.
  • Frequency: Typically performed on a regular basis, such as daily or weekly.

2.Differential Backup :

  • Description: Captures only the data that has changed since the last full backup.
  • Purpose: Reduces the time and space required for backups by including only the changes.
  • Frequency: Can be taken between full backups to provide incremental updates.

3.Transaction Log Backup:

  • Description: Backs up the transaction log, recording changes made to the database since the last transaction log backup.
  • Purpose: Allows for point-in-time recovery and minimizes data loss.
  • Frequency: Usually taken more frequently, especially in databases with high transaction volumes.

4.File or Filegroup Backup:

  • Description: Targets specific files or filegroups within the database.
  • Purpose: Enables more granular backup and restore operations, useful for large databases.
  • Frequency: Can be used based on the need to selectively backup specific portions of the database.

These backup types collectively form a comprehensive strategy for ensuring data integrity, availability, and recoverability in SQL Server environments. The choice of which backup type(s) to use depends on factors such as the database size, recovery objectives, and the desired balance between backup frequency and resource utilization.


If you have any questions or details you would like to add, feel free to write me.

Categories
Articles Backups SQL Windows Server

How to Perform a Database Copy in SQL Server

Copying databases can often be quite useful, but knowing how to do it is crucial. In SQL Server, an easy way to copy a database is to use the “Database Copy Wizard.” Here’s how to do it using this wizard:

  1. First, open the SQL Server Management Studio (SSMS) application and connect to your SQL Server.

You can access the article where I previously explained the installation process from here.

2. In the “Databases” tab on the left, locate the database you want to copy. This is the database you’ll be duplicating.

3. Now, right-click on it and select the “Tasks” option, then click on “Copy Database” to start the Database Copy Wizard.

4. On the wizard’s initial screen, you’ll see the “Welcome to the Copy Database Wizard” message. Click “Next” to proceed.

5. On the “Select a Source Server and Database” screen, enter the name of your source SQL Server instance and, if necessary, provide authentication credentials. Then, choose the database you want to copy.

6. On the “Select a Destination Server and Database” screen, specify the name of your destination SQL Server instance and enter a new name for the copied database.

7. On the “Select Transfer Method” screen, you typically prefer to use the “Use the SQL Management Object method” option.

8. On the “Select Databases” screen, select the relevant database for the copy operation..

9. Next, on the “Configure Destination Database” screen, you can configure settings like database size, growth options, and other configurations.

10. “Configure the Package” will create an Integration Services package with your specified settings.

11. On the “Schedule and Start Copying” screen, you can choose to start the process immediately or create a scheduling plan.

12. In the final step, review the operation and click “Finish” to initiate the database copying process.

This process can take some time depending on your settings and the database’s size. Once completed, the new database will be created on the destination server.

So, you’ve successfully copied your database!


If you have any questions or details you would like to add, feel free to write me.

Categories
Articles Backups

rclone: Command Line Tool for Multi-Cloud Storage Operations and Installation Guide

rclone” is a command-line based tool that allows interaction with various cloud storage providers (such as Google Drive, Dropbox, Amazon S3, Microsoft OneDrive, etc.) and helps synchronize data across these storage spaces. Here are some of the use cases for rclone:

  1. Cloud Storage Synchronization: rclone can be used to synchronize or back up files between different cloud storage providers. For instance, you can synchronize files from your computer to Google Drive or Dropbox.
  2. Backup and Recovery: rclone can be utilized to back up important data to cloud storage. This simplifies the process of recovering files in case of data loss.
  3. Data Movement and Transfer: When you need to move large files or datasets between different cloud storage providers, rclone can come in handy.
  4. Remote File Management: Through the command-line interface, rclone enables you to manage files in remote cloud storage accounts. You can delete, move, or rename files and folders.
  5. Multi-Account Management: When dealing with multiple cloud storage provider accounts, rclone can help manage them. This makes it easy to switch between different accounts.
  6. Script Automation: You can automate rclone commands and create scripts to perform automatic backups or synchronizations based on a specific schedule.
  7. Data Analysis and Processing: rclone can be integrated with other tools used for data analysis or processing. For example, you can pull and process data and then store the results in cloud storage.
  8. Large Data Transfer: When transferring large datasets between different cloud storage providers, rclone ensures fast and reliable data transfer.
  9. Server Backup: You can use rclone to back up server data to cloud storage spaces.
  10. Data Sharing: With rclone, you can share your cloud storage spaces with others, which can be useful for collaboration purposes.

In summary, rclone is a versatile tool that finds application in a wide range of scenarios including data synchronization, backup, data movement, and management of cloud storage accounts.

Installation of rclone

Step 1: Prepare the Required Tools

Before installing rclone, you’ll need a command-line environment to work with through the terminal.

  • On Linux or macOS, open the Terminal application.
  • On Windows, open PowerShell or Command Prompt.

Step 2: Download rclone

You can download rclone from the official website. Choose the version suitable for your operating system (Windows, macOS, Linux) and download it.

  • rclone download
    rclone download
  • Sizin için uygun olan sürümü (örneğin, Windows, macOS veya Linux) seçin ve indirin.

Step 3: Installation and Configuration of rclone

Extract the downloaded rclone file and move the files to an appropriate location (e.g., /usr/local/bin on macOS and Linux, C:\Windows\System32 on Windows).

Step 4: rclone Configuration

Before you start using rclone, you need to configure your cloud storage accounts. Open the terminal or command prompt. To initiate the rclone configuration, use the following command:

rclone config
rclone config
rclone config

Follow the on-screen instructions to add and configure your cloud storage accounts. You’ll complete steps such as OAuth2 authentication or other identity verification methods depending on the cloud service you’re using.

Once configuration is complete, you can save it with a chosen name.

Step 5: Using rclone

rclone offers great flexibility in its usage. For example, to upload a file from your local disk to a cloud storage account:

rclone copy /path/to/local/file remote: destination/folder

Here, replace /path/to/local/file with the local file’s path, remote with the name you configured for the cloud storage, and destination/folder with the target folder in the cloud storage account.

To sum up, by following these steps, you can start using rclone to easily synchronize, backup, move, and share your data across different cloud storage providers.


If you have any questions or details you would like to add, feel free to write me.

Categories
Articles Azure Backups

Accessing Azure Blob Storage with Access Keys

Microsoft Azure Storage Explorer: Microsoft Azure’s cloud platform integrates with a free tool known as Microsoft Azure Storage Explorer. This tool is developed to simplify the management and exploration of data stored in the Azure cloud environment. Azure Storage Explorer provides users with a user-friendly interface to perform a range of tasks such as accessing data sources, viewing, uploading, downloading, editing, and deleting data.

The primary use cases of Microsoft Azure Storage Explorer include:

  1. Managing Azure Storage Resources: Azure Storage Explorer can be used to manage various Azure storage services, including Azure Blob Storage, Azure Table Storage, Azure Queue Storage, and Azure Cosmos DB. This allows users to view, modify, and edit the content of these services.
  2. Data Transfer: Storage Explorer facilitates data transfer between your local computer and Azure or vice versa. It can be used to quickly upload or download large files or datasets to/from Azure Blob Storage.
  3. Blob Storage Management: Specifically for Azure Blob Storage, you can use it to view blob containers and their contents, create new containers, upload, download, delete blobs, and perform sorting operations.

Installing Microsoft Azure Storage Explorer: Here are the steps to install Microsoft Azure Storage Explorer:

  1. Download: You can download Microsoft Azure Storage Explorer from the official website. You can directly download it using the following link: Microsoft Azure Storage Explorer Download Page.
Microsoft Azure Storage Explorer İndirme Sayfası

2.Run the Installer: After downloading, run the installer. The installer may check for prerequisites before starting the installation process.

3.Installation Options: When the installer starts, you can configure installation options. Typically, you may want to proceed with the default options, but you can change installation paths and other settings as needed.

4.Installation Process: The installation process will begin. Azure Storage Explorer and its dependencies will be installed on your computer. This process may take a few minutes.

5.Wait for Installation to Finish: Once the installation is completed, the installer will show you a completion message. You can click “Finish” or “Open” to launch Azure Storage Explorer.


Connecting to Azure Blob Storage with Access Keys: You can connect to Azure Blob Storage using access keys via Azure Storage Explorer with the following steps:

1.Sign In to Azure Portal: To access your Azure Blob Storage account, sign in to the Azure Portal.

2.Select Your Blob Storage Account: After signing in, select your Blob Storage account or create a new one.

3.Find Your Access Keys: On your Blob Storage account page, there should be an option on the left for “Access keys” or something similar. Click on this option to find your access keys.

4.Copy the Access Keys: On the access keys page, you will see two keys under “Key1” or “Key2”. Choose one of these keys and click the “Copy” button to copy the key to your clipboard.

5.Launch Azure Storage Explorer: Start the Azure Storage Explorer application on your computer.

6.Add an Account with Access Keys: Select “Access key” as the “Account kind” and enter the following information:

  • Account name: The name of your Blob Storage account.
  • Access key: Paste the access key from your clipboard.

7.Connect: After entering the login information, click the “Connect” or similar button to connect to your Blob Storage account.

8.Manage Blobs: You can now view and manage blob containers and their contents within your Blob Storage account.


If you have any questions or details you would like to add, feel free to write me.