SQL Server can support different TLS (Transport Layer Security) versions across various editions. The TLS versions supported by SQL Server may vary depending on the SQL Server version and the Windows operating system in use.
In general, SQL Server 2008 and later versions typically support TLS 1.0, TLS 1.1, and TLS 1.2. However, it’s essential to obtain the most up-to-date information from Microsoft’s official sources, as security updates and patch releases are primarily designed to address security vulnerabilities.
Below is a table illustrating the commonly supported TLS versions. Keep in mind that this information may change over time:
SQL Server Version
Min. TLS Version
Max. TLS Version
SQL Server 2008
TLS 1.0
TLS 1.2
SQL Server 2008 R2
TLS 1.0
TLS 1.2
SQL Server 2012
TLS 1.0
TLS 1.2
SQL Server 2014
TLS 1.0
TLS 1.2
SQL Server 2016
TLS 1.0
TLS 1.2
SQL Server 2017
TLS 1.0
TLS 1.2
SQL Server 2019
TLS 1.2
TLS 1.3*
* SQL Server 2019 may support TLS 1.3, but this is contingent on the operating system and configuration.
From a security perspective, it is recommended to use the latest version of SQL Server and keep the operating system up to date. Additionally, avoiding the use of unsupported TLS versions is crucial to prevent potential security vulnerabilities.
If you have any questions or details you would like to add, feel free to write me.
In SQL Server, backups are typically taken in four different types:
Full Backup
Differential Backup
Transaction Log Backup
File or Filegroup Backup
Let’s delve into the details of each type of backup in SQL Server:
1.Full Backup:
Description: A complete backup of the entire database.
Purpose: Provides a baseline for a complete restore of the database in case of a failure.
Frequency: Typically performed on a regular basis, such as daily or weekly.
2.Differential Backup :
Description: Captures only the data that has changed since the last full backup.
Purpose: Reduces the time and space required for backups by including only the changes.
Frequency: Can be taken between full backups to provide incremental updates.
3.Transaction Log Backup:
Description: Backs up the transaction log, recording changes made to the database since the last transaction log backup.
Purpose: Allows for point-in-time recovery and minimizes data loss.
Frequency: Usually taken more frequently, especially in databases with high transaction volumes.
4.File or Filegroup Backup:
Description: Targets specific files or filegroups within the database.
Purpose: Enables more granular backup and restore operations, useful for large databases.
Frequency: Can be used based on the need to selectively backup specific portions of the database.
These backup types collectively form a comprehensive strategy for ensuring data integrity, availability, and recoverability in SQL Server environments. The choice of which backup type(s) to use depends on factors such as the database size, recovery objectives, and the desired balance between backup frequency and resource utilization.
If you have any questions or details you would like to add, feel free to write me.
Copying databases can often be quite useful, but knowing how to do it is crucial. In SQL Server, an easy way to copy a database is to use the “Database Copy Wizard.” Here’s how to do it using this wizard:
First, open the SQL Server Management Studio (SSMS) application and connect to your SQL Server.
You can access the article where I previously explained the installation process from here.
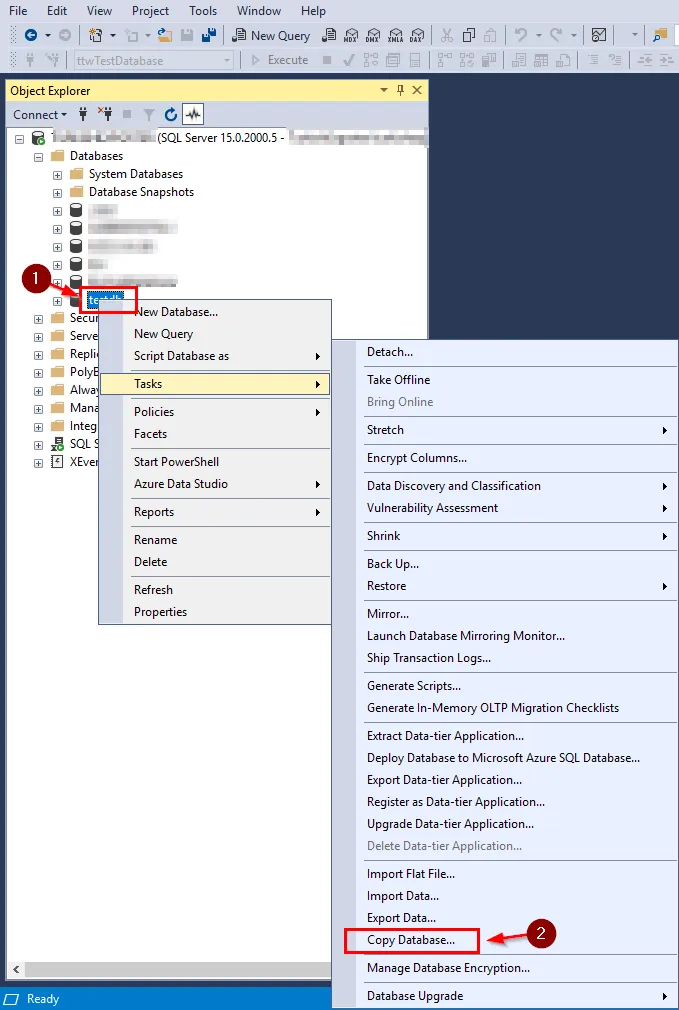
2. In the “Databases” tab on the left, locate the database you want to copy. This is the database you’ll be duplicating.
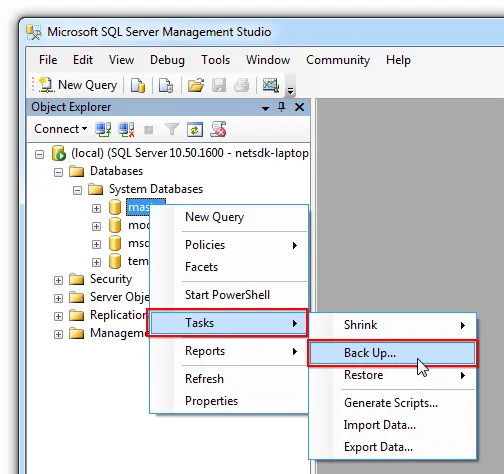
3. Now, right-click on it and select the “Tasks” option, then click on “Copy Database” to start the Database Copy Wizard.
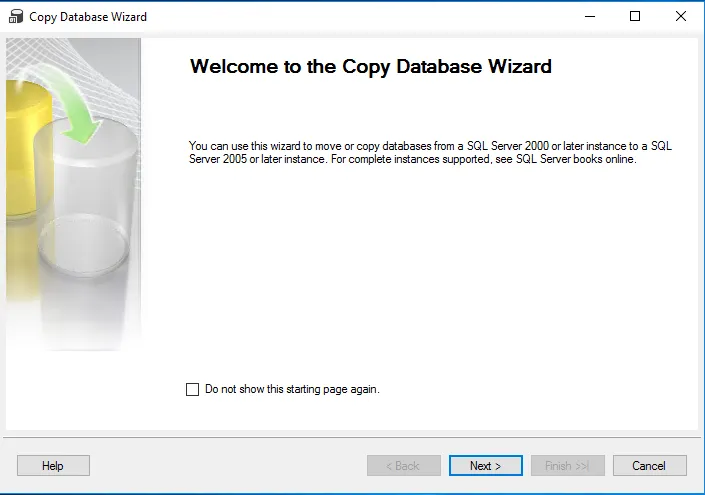
4. On the wizard’s initial screen, you’ll see the “Welcome to the Copy Database Wizard” message. Click “Next” to proceed.
5. On the “Select a Source Server and Database” screen, enter the name of your source SQL Server instance and, if necessary, provide authentication credentials. Then, choose the database you want to copy.
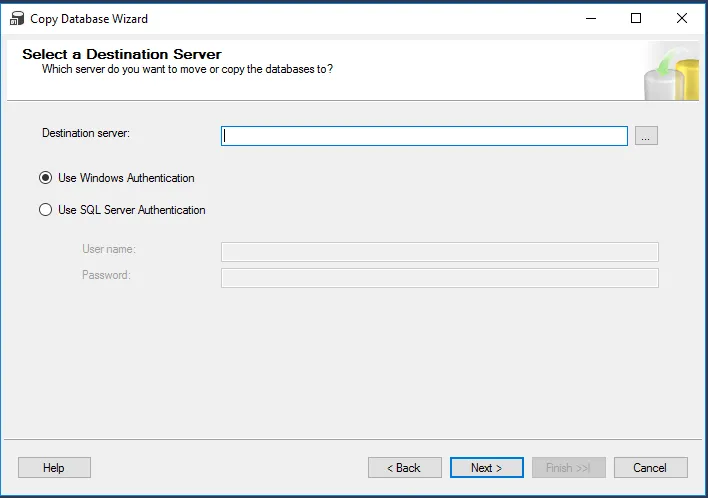
6. On the “Select a Destination Server and Database” screen, specify the name of your destination SQL Server instance and enter a new name for the copied database.
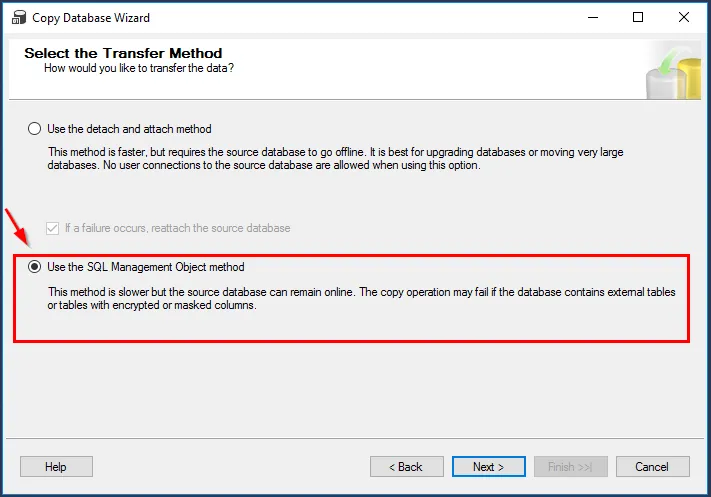
7. On the “Select Transfer Method” screen, you typically prefer to use the “Use the SQL Management Object method” option.
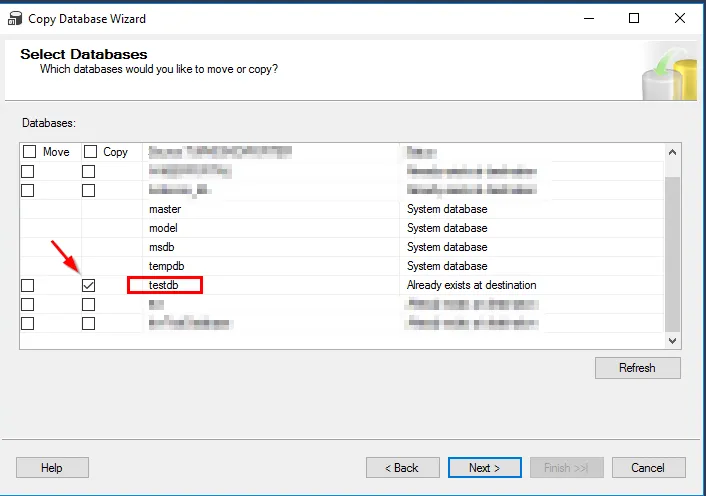
8. On the “Select Databases” screen, select the relevant database for the copy operation..
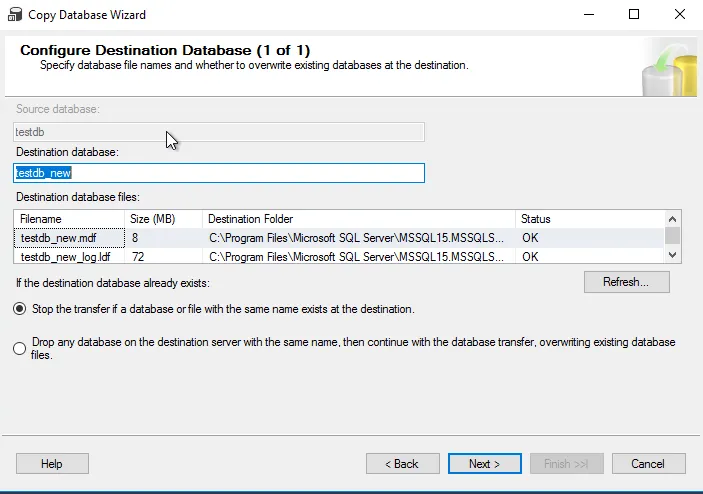
9. Next, on the “Configure Destination Database” screen, you can configure settings like database size, growth options, and other configurations.
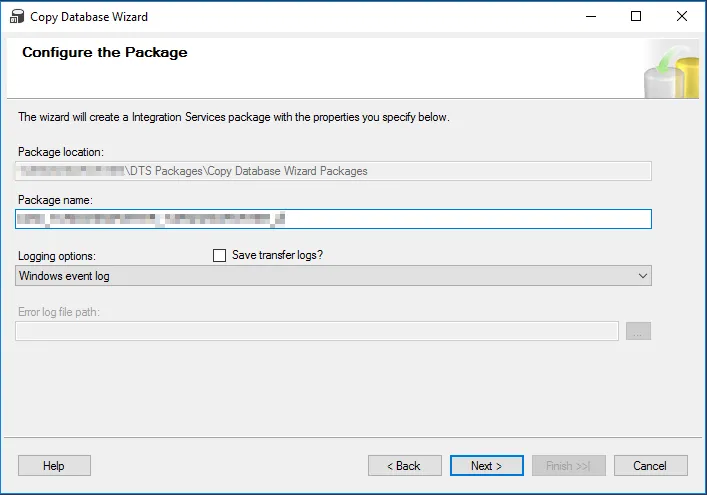
10. “Configure the Package” will create an Integration Services package with your specified settings.
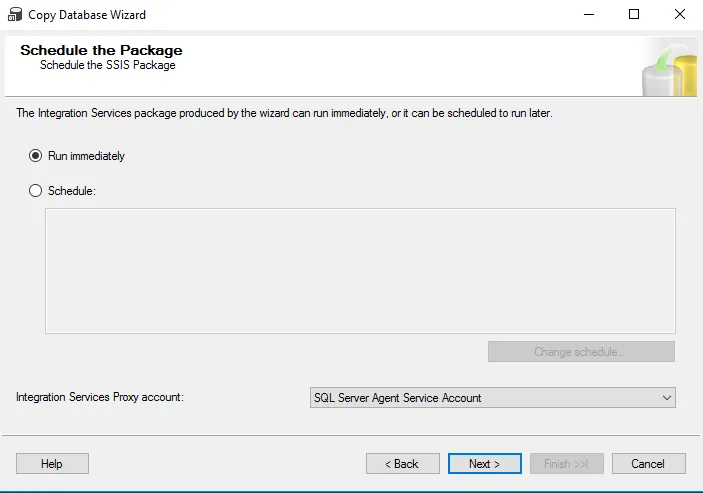
11. On the “Schedule and Start Copying” screen, you can choose to start the process immediately or create a scheduling plan.
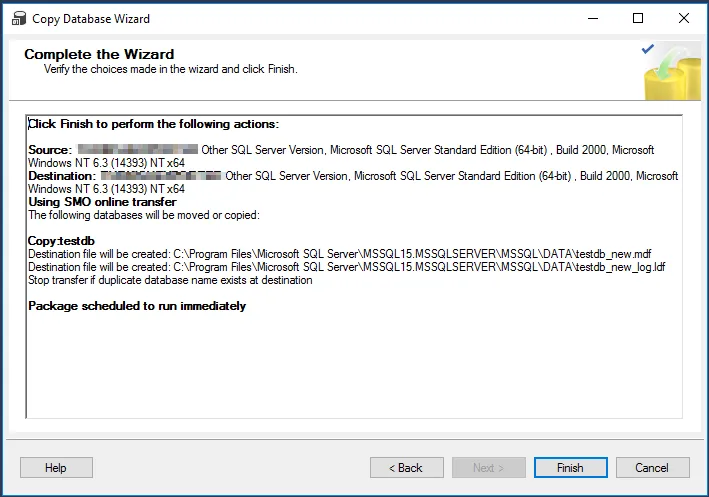
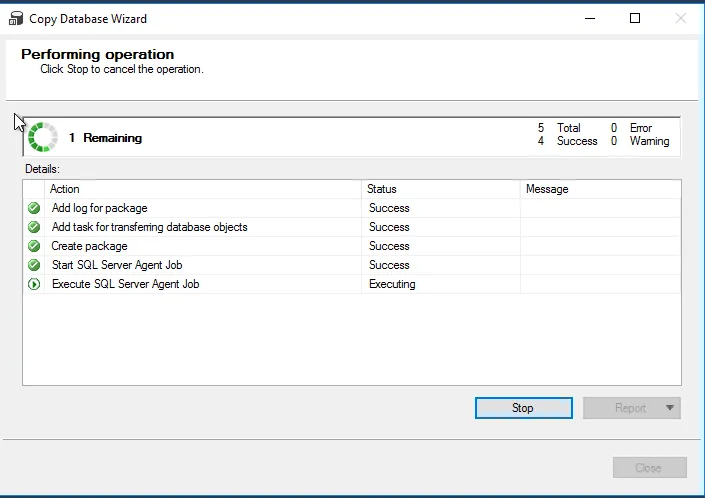
12. In the final step, review the operation and click “Finish” to initiate the database copying process.
This process can take some time depending on your settings and the database’s size. Once completed, the new database will be created on the destination server.
So, you’ve successfully copied your database!
If you have any questions or details you would like to add, feel free to write me.
Azure Data Studio (ADS) and SQL Server Management Studio (SSMS) are both database management tools used for different purposes, and which tool to use depends on your needs and preferences.
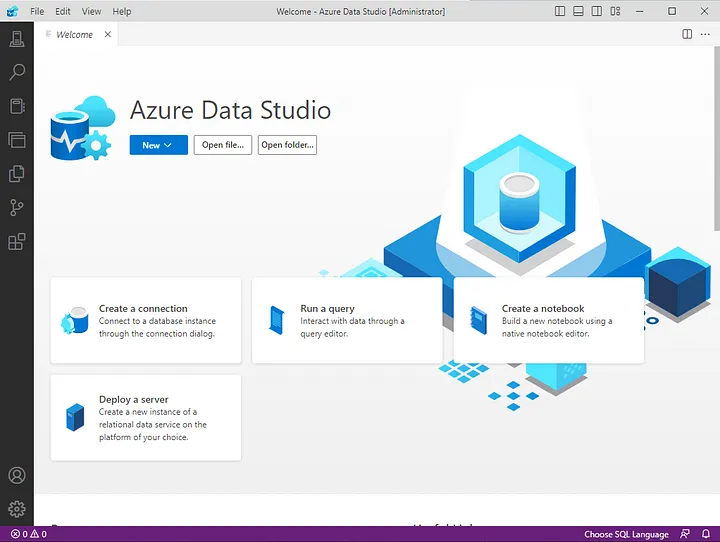
Azure Data Studio (ADS):
Azure Data Studio (ADS):
ADS offers cross-platform support, meaning it can be used on Windows, macOS, and Linux. This can be essential for collaboration among team members using different operating systems.
It is primarily designed for database development and query creation. It is used for editing queries, visualizing query results, and managing databases at a high level.
It comes with an integrated query editor with advanced development features such as syntax highlighting, auto-completion, and code hints.
ADS can work with multiple database systems (SQL Server, PostgreSQL, MySQL, MongoDB, etc.) and allows you to create different connection profiles.
You can extend its functionality using extensions and plugins, enabling you to customize your workflow by installing or developing specific extensions.
SQL Server Management Studio (SSMS):
SQL Server Management Studio (SSMS):
SSMS only runs on the Windows operating system and is specifically designed for managing SQL Server. Therefore, it is recommended for those working primarily with SQL Server databases.
SSMS allows you to create, edit, manage, and back up database objects. It provides tools for tasks like database backup, security configuration, and performance monitoring.
It offers specialized reports and performance monitoring tools for professional SQL Server administration.
SSMS provides specialized tools and design surfaces for tasks like creating databases, writing stored procedures, and designing workflows.
It offers advanced monitoring and security features for database administrators.
In conclusion, the choice between Azure Data Studio (ADS) and SQL Server Management Studio (SSMS) depends on your project requirements, team member preferences, and the database system you are working with. If you have general database development and query-writing needs across various platforms, ADS might be a better fit. However, if you are primarily working with SQL Server and handling administrative tasks, SSMS is the more suitable choice. To make the best decision for your needs, consider trying out both tools and assessing which one aligns better with your workflow.
If you have any questions or details you would like to add, feel free to write me.
SQL Server Management Studio (SSMS) is the official tool used for Microsoft SQL Server database management and query operations. SSMS enables you to create, edit, back up, and execute data queries within databases. Additionally, you can configure security settings and monitor database performance in SQL Server.
The core functions of SSMS include: 1.Database Management: SSMS allows you to create, delete, rename, and edit SQL Server databases. It provides graphical interfaces and commands for managing your databases.
2.Query Operations: You can write SQL queries and execute them on SQL Server using SSMS. You can view and process the results, which is used for accessing and manipulating data within your database.
3.Backup and Restore: You can take backups of your databases and restore them when needed. This is essential for preventing data loss and safeguarding your database operations.
4.Security Settings: You can configure security settings for your databases and manage access control. You can define users and roles.
5.Performance Monitoring: It provides tools and reports to monitor the performance of SQL Server. This helps you optimize your database performance.
SQL Server Management Studio is a versatile tool for managing and developing with SQL Server, and it serves as a fundamental component for many database applications that work with SQL Server. By installing SSMS on your computer, you can access the necessary tools to start working with SQL Server. You can easily install SSMS by following the instructions below.
SQL Server Management Studio (SSMS) installation:
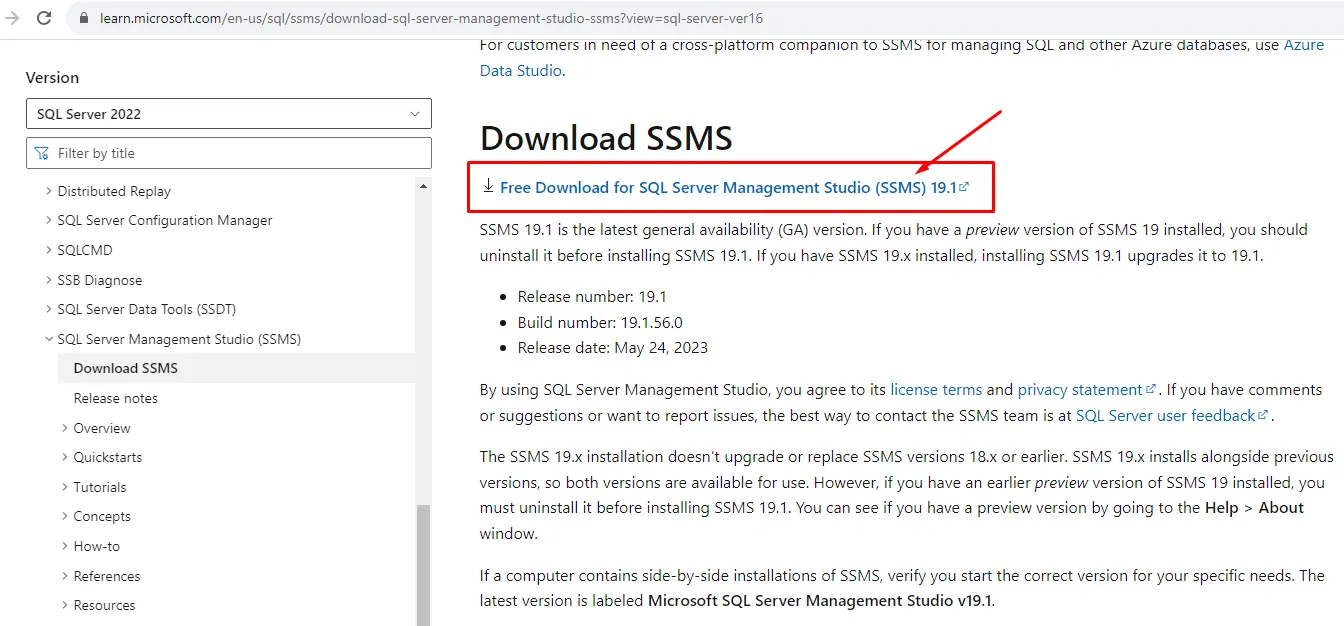
1.Downloading SQL Server Management Studio: The first step is to download the latest version of SSMS. You can do this by visiting the official Microsoft website. The download link is as follows:
2.Running the Downloaded File: Double-click the downloaded installation file to run it. If a User Account Control (UAC) window appears, select “Yes” or “Continue” to grant permission.
3.Accepting the License Agreement: Read the license agreement carefully, and if you agree, check the “I accept the license terms” option and click the “Next” button.
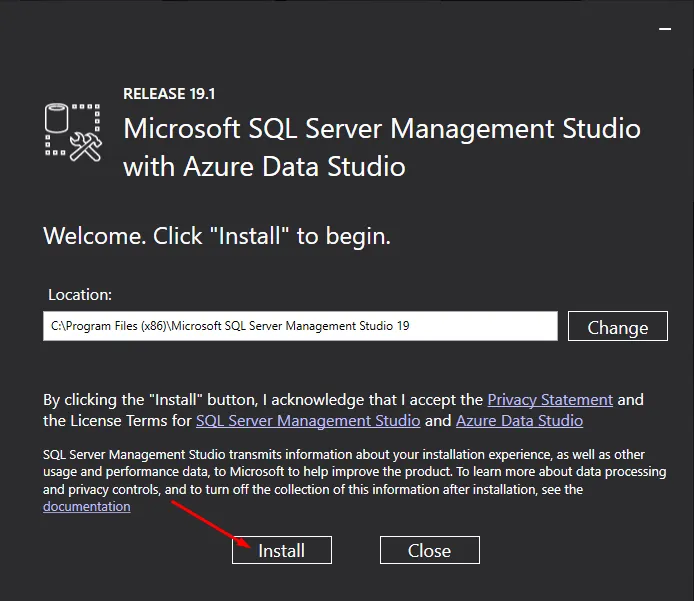
4.Installation Path Selection: If you choose the “Custom” installation type, you can select a path in this step to determine where SQL Server Management Studio will be installed. If you prefer to use the default settings, you can click the “Install” button.
install
install
5.Custom Installation Options: If you have chosen the “Custom” installation option, you can customize which components will be installed in this step. Select the components according to your needs and click the “Next” button.
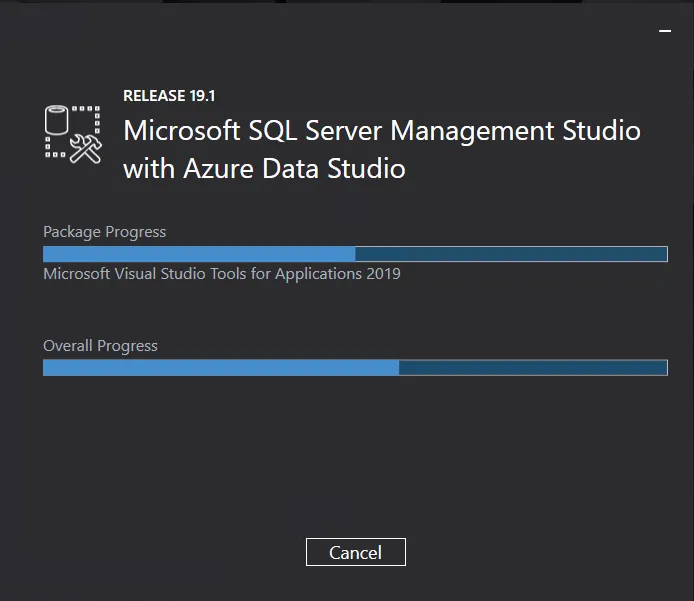
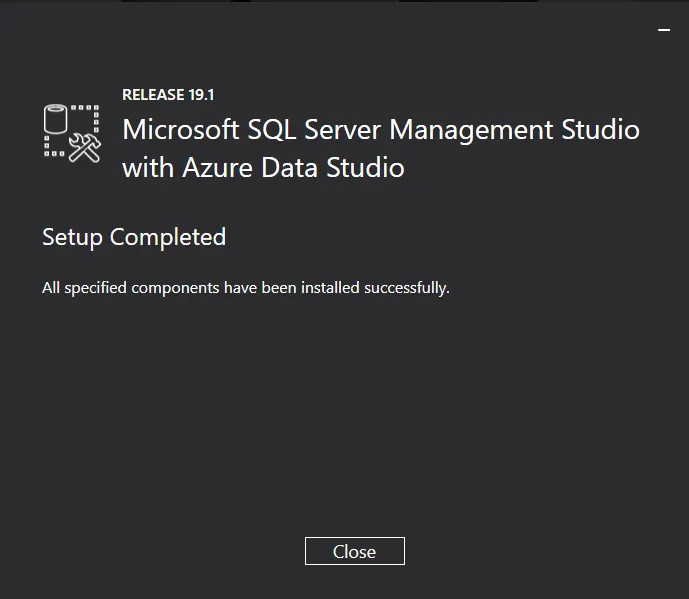
6.Completion of Installation: The installation process may take some time. Once it’s finished, click the “Close” button to complete the installation.
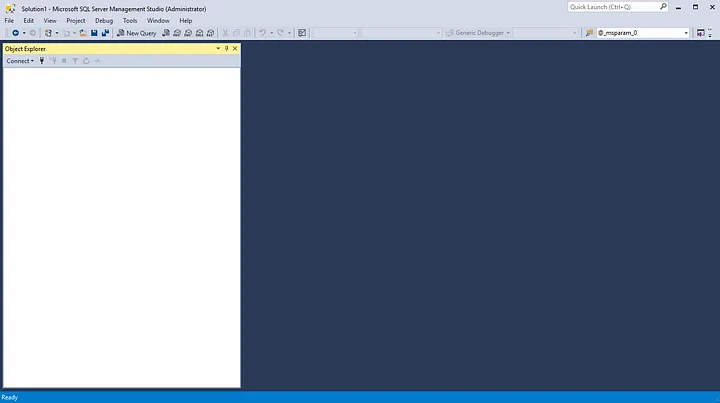
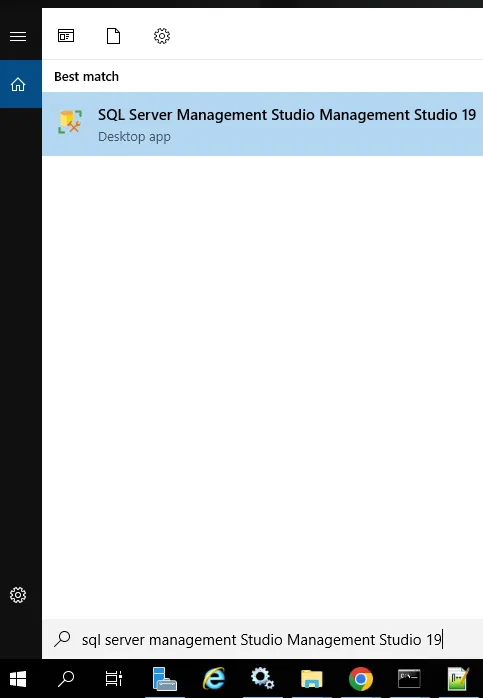
7.Launching SSMS: When the installation is complete, you can launch the SQL Server Management Studio program using the shortcut on your desktop or from the Start Menu. Start the program, and you can begin managing your SQL Server databases.
You should have successfully installed SSMS on your computer by now. You can use this tool to manage your databases and run queries.
How to Perform Database Management and Performance Monitoring Using SQL Server Management Studio (SSMS):
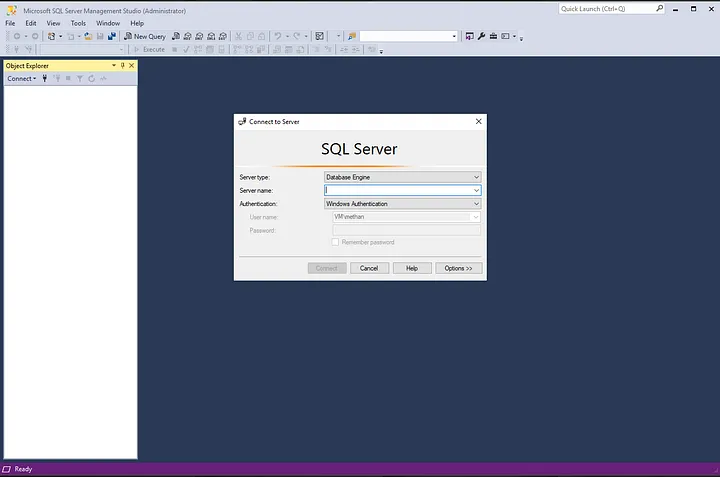
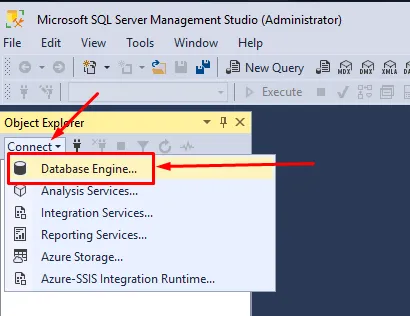
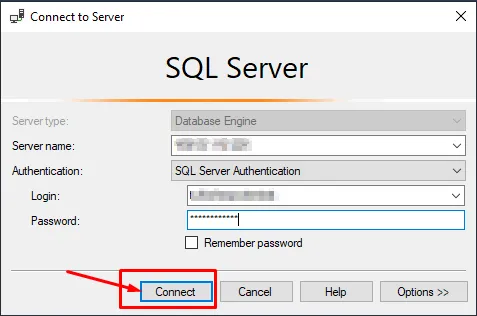
Connecting to a Server: When SSMS starts, you will need to connect to a server. The “Connect to Server” window will open. This window allows you to choose how to connect to SQL Server.
Server Type: Choose the server type. Typically, the “Database Engine” option is used.
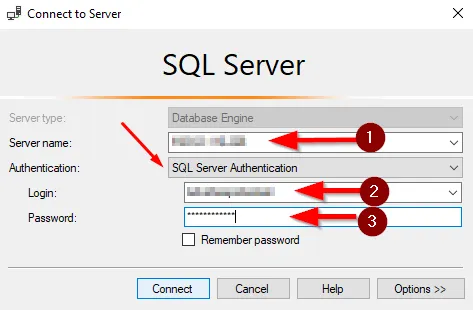
Server Name: Enter the name or IP address of the SQL Server.
Authentication: Choose one of the options, either “Windows Authentication” or “SQL Server Authentication,” to connect to SQL Server.
2.Connecting to the Server: After entering the necessary information, click the “Connect” button. When SSMS successfully connects to the server, it will close the connection window.
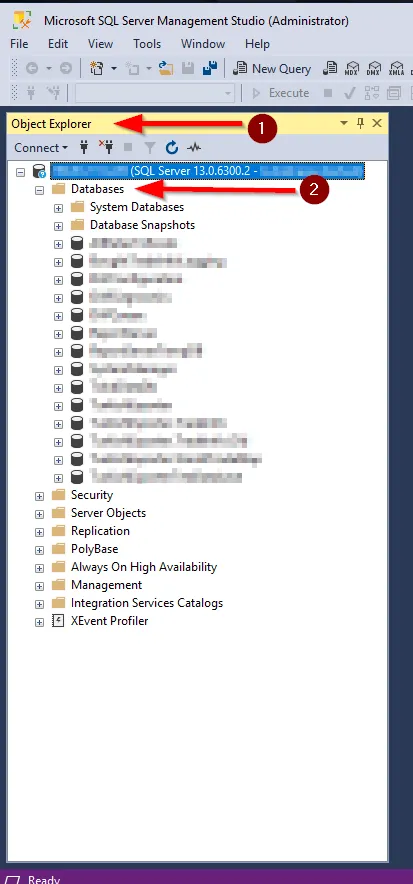
3.Viewing Databases: In the “Object Explorer” window on the left side, you can view your existing databases by clicking on the “Databases” button located under the connected server. Here, you will see all the databases, including system databases.
Object Explorer
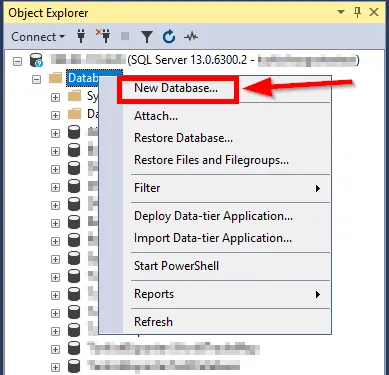
4.Creating a New Database: To create a new database, right-click on “Databases” and select “New Database.” In the opened window, you can configure the database’s name, filegroups, and other settings.
New Database
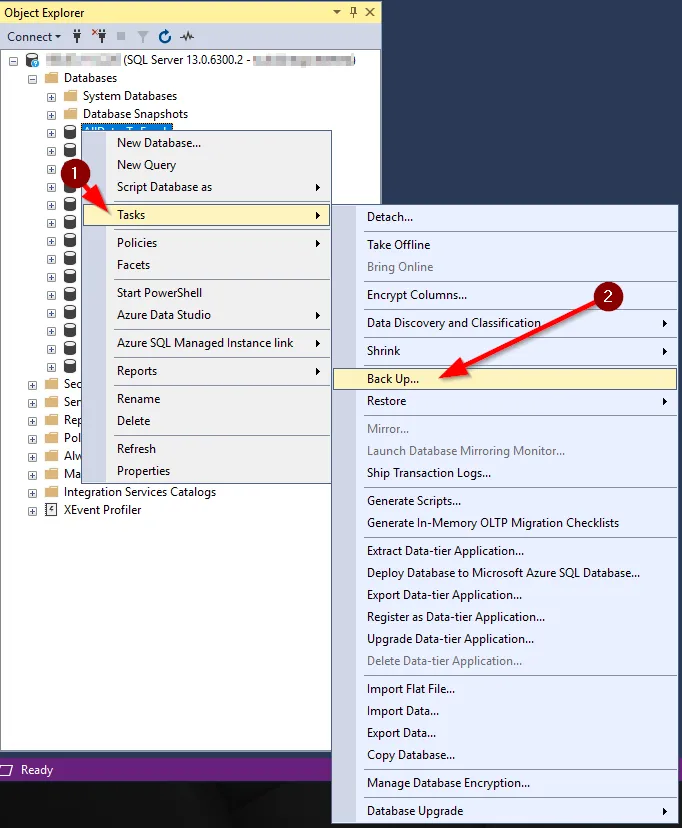
5.Database Backup and Restore: To back up or restore databases, right-click on “Tasks” and use the “Back Up” or “Restore” options to perform these operations.
Tasks
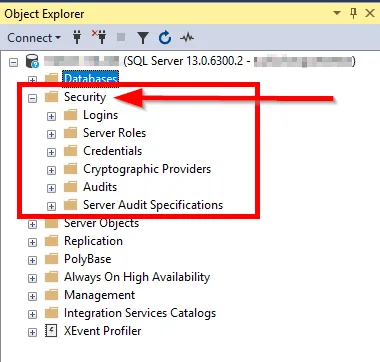
6.Security Settings: To configure the security settings for your databases, go to the “Security” section. Settings related to users, roles, and permissions are managed here.
Security
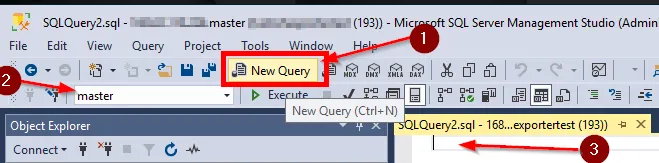
7.Running Queries: To execute SQL queries, you can open a new query window. You can write and execute SQL queries using the “New Query” option.
New Query
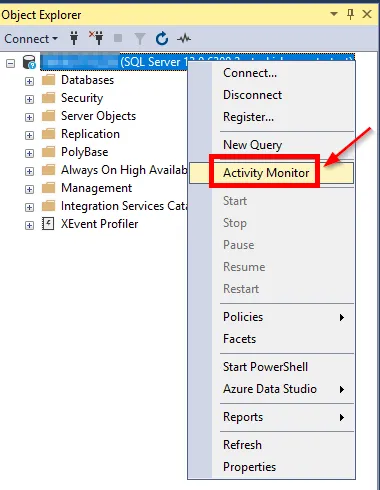
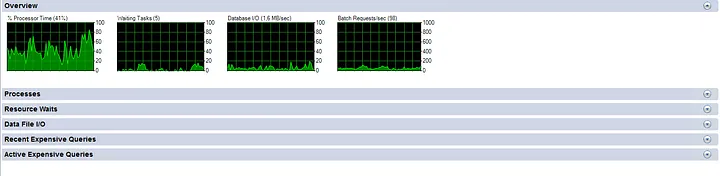
8.Performance Monitoring: SSMS provides tools and reports for monitoring the performance of SQL Server. This helps you optimize your database’s performance.
Performans Monitor
If you have any questions or details you would like to add, feel free to write me.