Today, web security has become more important than ever. The Server header, which explicitly specifies the operating system and version of a web server, can be a valuable source of information for potential attackers. Therefore, if you are using IIS (Internet Information Services), it is a good security practice to remove the Server header.
Step 1: Open IIS Manager
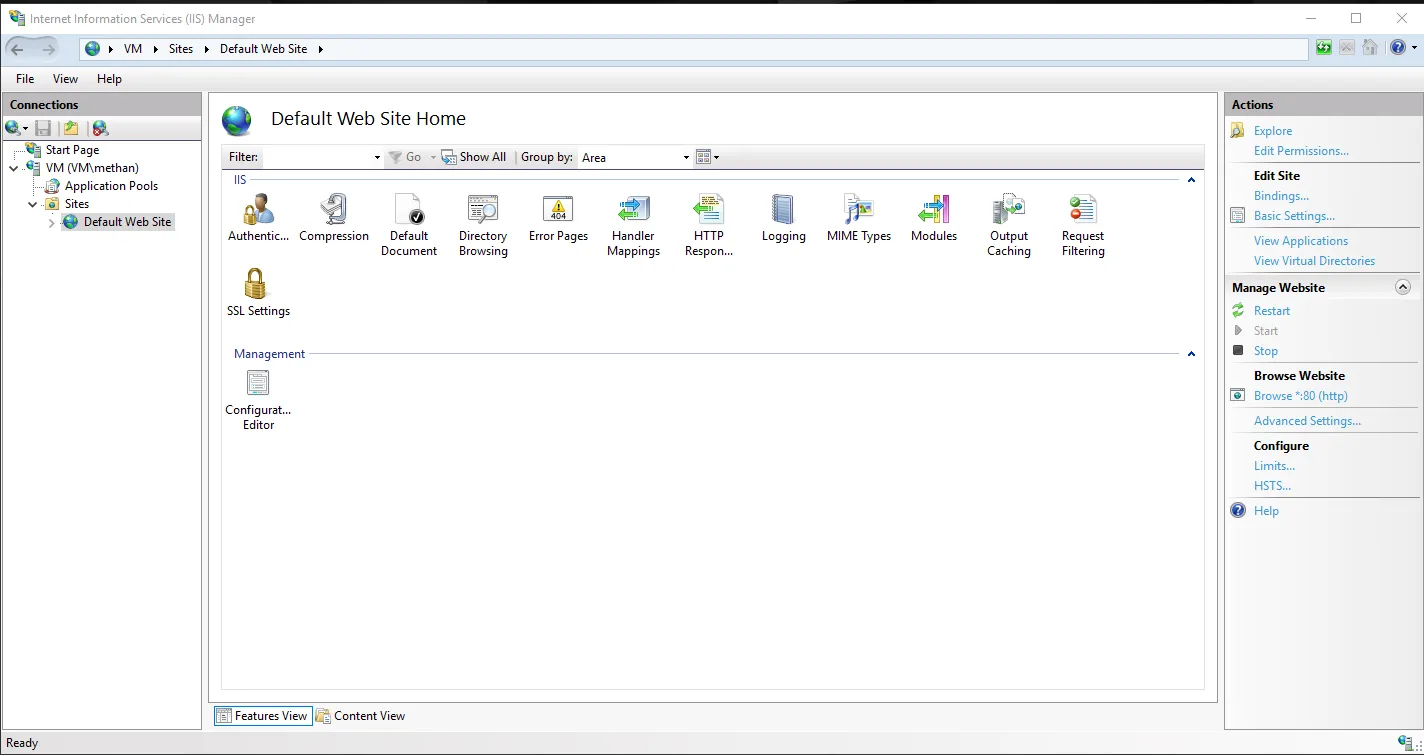
As a first step, open IIS Manager. You can easily access it by typing “IIS Manager” from the Start menu.
Step 2: Web Server and Site Selection
Select your server and the website you are running on from the menu on the left.
Step 3: HTTP Response Headers
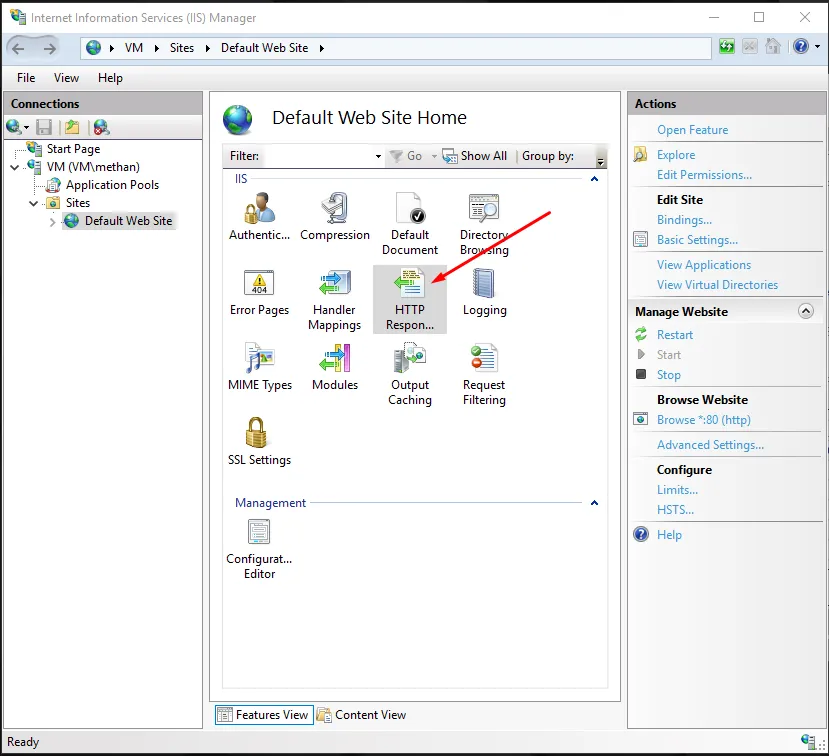
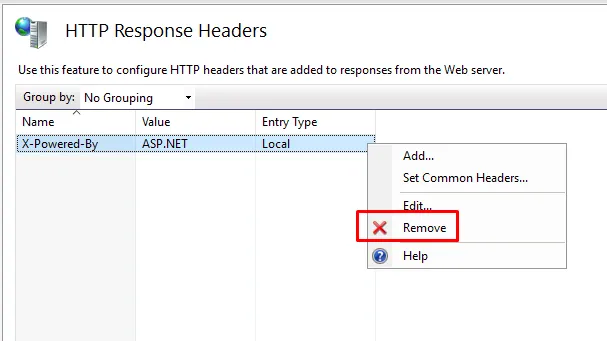
On the right side, locate and click on “HTTP Response Headers”.
Step 4: Edit Server Header
Find the “Server” heading, right-click on it and use “Remove” or “Edit Feature Settings” to clear or customize the value.
Step 5: Save Changes
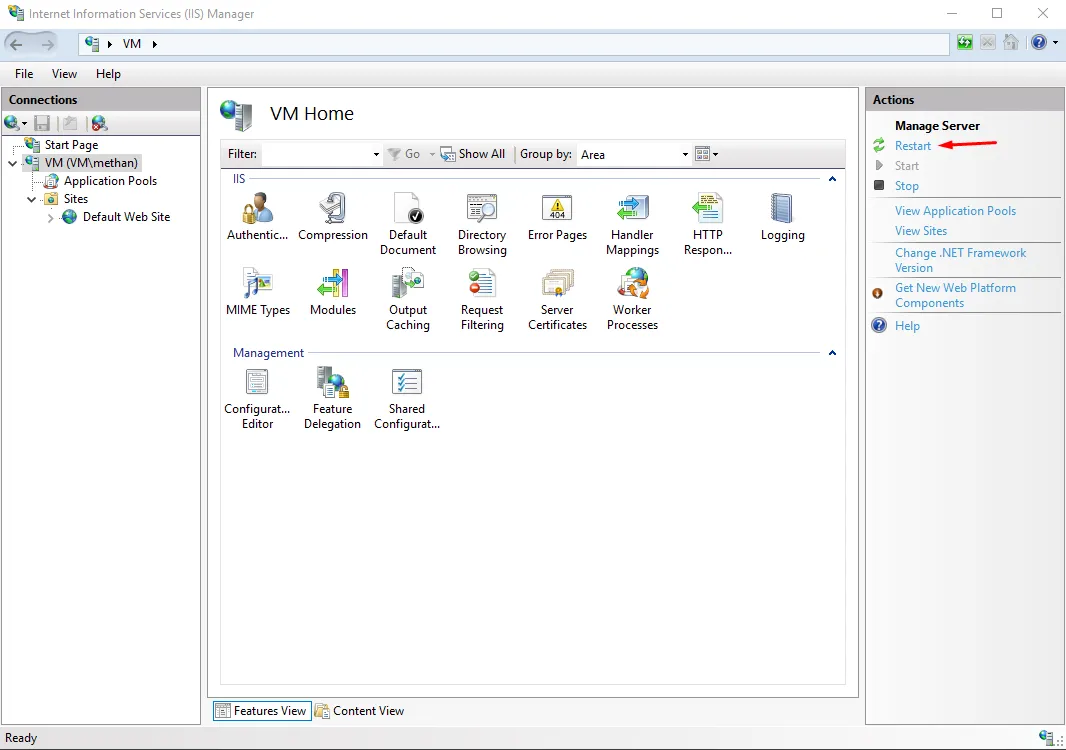
Use the “Apply” option from the “Actions” menu in the upper right corner to apply the changes made..
Step 6: Restart IIS
If necessary, restart IIS so that the changes take effect. Alternative Step With Web.config File
You can also remove the Server header by directly intervening in your web.config file. You can perform this setting using the following example:
You can remove the Server header by adding this XML block into the<configuration> element of your web.config file.
By following these simple steps, you can improve the security of your web server and minimize the information available to potential attackers. Remember that it is always good practice to take a backup before implementing these changes. Never underestimate the importance of protecting your web applications by prioritizing your security.
If you have any questions or details you would like to add, feel free to write me.
Adding RAM limits to an application pool (App Pool) on an IIS (Internet Information Services) server is an important step to control and stabilize the server’s resources. IIS monitors and manages web applications through application pools. Here are the steps to add RAM limits to an application pool in IIS:
1.Open the IIS Administration Tool:
Open “Internet Information Services (IIS) Manager” from the Start menu, and find the “Application Pools” section from the context menu on the left.
2.Selecting an Application Pool:
Find the application pool and right-click on it and select “Edit”.
3.Open the Edit Window:
In the editing window that opens, locate the “Related Actions” tab.
4.Open Advanced Settings:
Click on “Advanced Settings…”. This allows you to see more configuration options of the application pool.
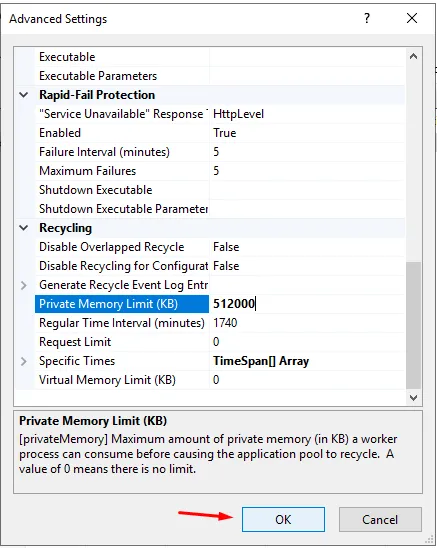
5.Private Memory Limit Setting:
In the advanced settings window, you will see a field titled “Private Memory Limit (KB)” or “Private Memory Limit (Bytes)”. This field sets the maximum amount of private memory to be allocated to the application pool.
Once a certain limit is reached, processes in the application pool can be stopped or restarted.
6.Setting Limits:
Set the desired maximum memory limits in the “Private Memory Limit” field. This value is usually in kilobytes, so for example 512000 KB would give the application pool a private memory limit of 512 MB.
7.Saving Changes:
After making the settings, click “OK” or “Apply” to save the changes.
8.Restarting the Application Pool:
After updating the settings, you may need to restart the application pool. Select the relevant application pool in the “Application Pools” section and right-click and select “Restart”.
By following these steps, you can add RAM limits to a specific application pool on your IIS server and manage resources more effectively.
Can we give a percentage limit to application pools?
Unfortunately, the process of setting RAM limits on application pools in IIS does not include the option to directly specify a percentage limit. However, the “Private Memory Limit” setting allows you to specify a certain amount of memory (in kilobytes). That is, instead of expressing this limit as a percentage, you specify it as a specific amount of memory.
For example, if a server has a total of 8 GB of RAM and you want to add a percentage limit to an application pool, you must calculate this manually. For example, if you want to allocate 10 percent of the total RAM to an application pool, this equals 8 GB * 0.10 = 800 MB. You then specify this value as the “Private Memory Limit” setting in the IIS administration tool.
Once you have specified the setting, the maximum amount of private memory available to the application pool will be limited to a specific value. This way, you can control problems caused by excessive memory consumption by the application pool.
If you have any questions or details you would like to add, feel free to write me
SQL Server can support different TLS (Transport Layer Security) versions across various editions. The TLS versions supported by SQL Server may vary depending on the SQL Server version and the Windows operating system in use.
In general, SQL Server 2008 and later versions typically support TLS 1.0, TLS 1.1, and TLS 1.2. However, it’s essential to obtain the most up-to-date information from Microsoft’s official sources, as security updates and patch releases are primarily designed to address security vulnerabilities.
Below is a table illustrating the commonly supported TLS versions. Keep in mind that this information may change over time:
SQL Server Version
Min. TLS Version
Max. TLS Version
SQL Server 2008
TLS 1.0
TLS 1.2
SQL Server 2008 R2
TLS 1.0
TLS 1.2
SQL Server 2012
TLS 1.0
TLS 1.2
SQL Server 2014
TLS 1.0
TLS 1.2
SQL Server 2016
TLS 1.0
TLS 1.2
SQL Server 2017
TLS 1.0
TLS 1.2
SQL Server 2019
TLS 1.2
TLS 1.3*
* SQL Server 2019 may support TLS 1.3, but this is contingent on the operating system and configuration.
From a security perspective, it is recommended to use the latest version of SQL Server and keep the operating system up to date. Additionally, avoiding the use of unsupported TLS versions is crucial to prevent potential security vulnerabilities.
If you have any questions or details you would like to add, feel free to write me.
SSL (Secure Sockets Layer) and TLS (Transport Layer Security) are cryptographic protocols used to secure communication over the internet. They are similar but distinct security protocols and are often collectively referred to as “SSL/TLS.”
1.SSL (Secure Sockets Layer):
SSL was initially developed by Netscape Communications Corporation in 1994.
Its first version, SSL 1.0, was never publicly released due to numerous security vulnerabilities.
SSL 2.0 emerged in 1995 and saw more widespread use, but its lifespan was short-lived due to security vulnerabilities.
SSL 3.0, introduced in 1996, was more secure. However, over time, various security vulnerabilities were discovered, leading to the abandonment of SSL 3.0.
2.TLS (Transport Layer Security):
TLS is considered an enhanced and secure version of SSL.
TLS 1.0, introduced in 1999, is an improved version of SSL 3.0 with security vulnerabilities addressed.
TLS 1.1 arrived in 2006, and TLS 1.2 followed in 2008, both enhancing the protocol’s security.
TLS 1.3 was released in 2018, introducing numerous security and performance improvements. TLS 1.3 is faster and more secure compared to its predecessors.
SSL and TLS secure internet communication by encrypting traffic, ensuring the confidentiality of data exchanges, and updating security protocols. However, as vulnerabilities and weaknesses emerge, these protocols are continually updated and improved.
TLS 1.2 or TLS 1.3?
As of 2021, TLS 1.0 and TLS 1.1 have been officially deprecated. Source
TLS 1.2:
It is an older version and is supported by many applications and systems.
It is a good option for establishing a secure connection but may have some security vulnerabilities.
Security experts recommend using TLS 1.3 whenever possible instead of TLS 1.2.
TLS 1.3:
It is a more recent version and offers a range of security improvements.
It includes faster connection establishment times and more secure encryption algorithms.
Designed to address security vulnerabilities, it is supported by many modern browsers and servers.
The version you should use depends on the systems, applications, and requirements in use. However, generally, you might prefer TLS 1.3 if possible, as it is more secure and offers better performance. Nevertheless, compatibility issues with older systems or specific requirements may necessitate the use of TLS 1.2.
Web servers and browsers typically automatically use up-to-date and supported TLS versions. If you manage a web server, it is advisable to use the latest and supported TLS version. As users, keeping your browsers and systems up-to-date is essential for enhancing security and ensuring optimal performance.
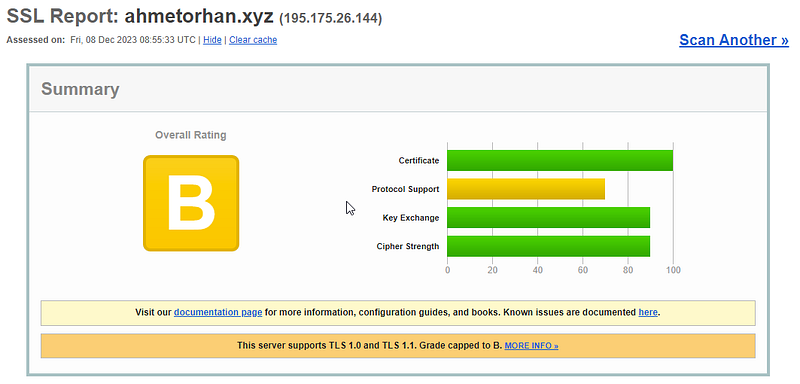
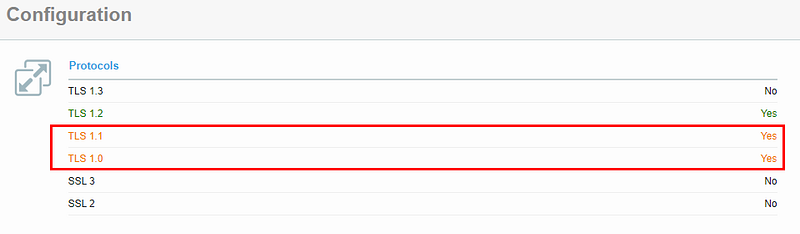
In this article, we will explore how to address the general SSL/TLS warnings provided by https://www.ssllabs.com/ssltest, a platform used to check and score the SSL/TLS security levels of the web hosting platforms. Additionally, we will conduct these checks on the test website https://ahmetorhan.xyz for demonstration purposes. The article will simplify the steps to disable the RC4 protocol and TLS 1.0 and TLS 1.1, especially focusing on how to implement these measures on Windows Servers. As indicated in the output, we will observe the necessity of disabling these protocols for enhanced security.
Our objective here is to disable the deprecated TLS 1.0 and TLS 1.1, as indicated in the following sections.
SSL Security Registry Configuration
Paste the provided code into a text document named “security_enable.txt.” Rename the file to “security_enable.reg” and remove the “.txt” extension.
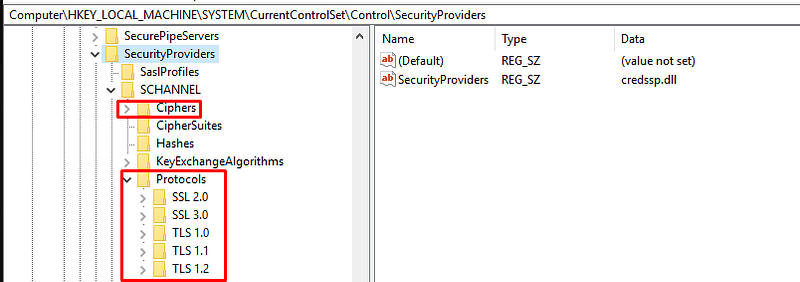
When we run the “security_enable.reg” file, all the entries above will be automatically added to the registry, and you can verify that they have been added as shown below.
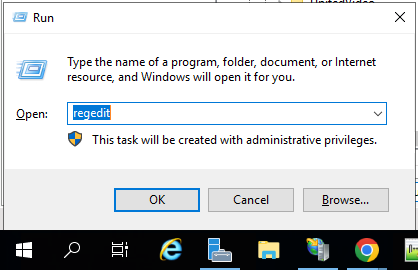
Open regedit by following the path Start -> Run.
After completing these steps, you need to restart your server for the changes to take effect.
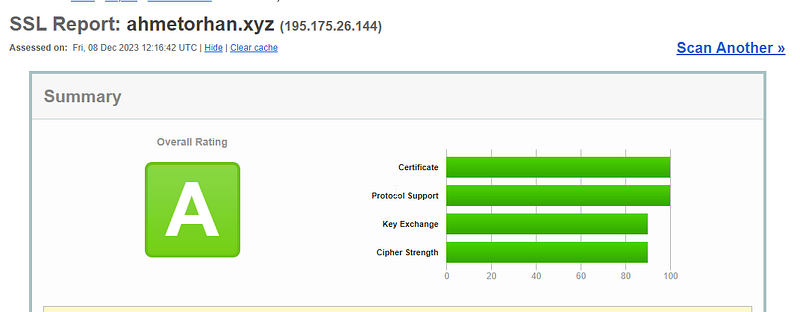
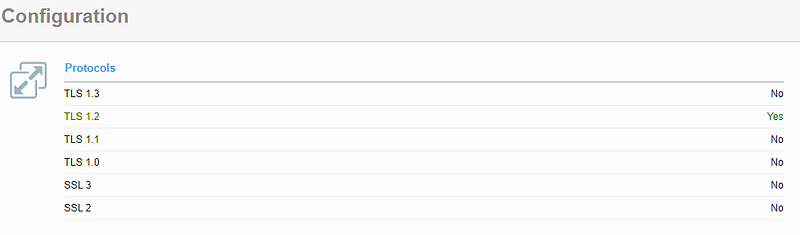
After the restart process is complete, I am initiating the test procedure again for the domain https://ahmetorhan.xyz. Initially classified as B, we now observe that it is categorized as A.
You can observe that the TLS 1.0 and TLS 1.1 protocols have been disabled.
If you want to revert the changes made in the registry, running the following entries and restarting will be sufficient.
ELK Stack (Elasticsearch, Logstash, Kibana Stack) is a data analysis and visualization platform where Elasticsearch, Logstash, and Kibana are brought together. These three open-source components are used collectively to gather, process, analyze, and visualize unstructured data. ELK Stack offers a powerful toolkit for organizations aiming to effectively work with large datasets.
Here are the fundamental components of ELK Stack:
Elastics
1. Elasticsearch: Elasticsearch is a search and analytics engine that provides rapid search, querying, and indexing capabilities for unstructured data. By swiftly indexing and storing data, it facilitates easy access to information. Elasticsearch is used to handle various types of unstructured data such as text documents, log files, time series data, and other non-structured data.
Logstash
2. Logstash: Logstash collects data from various sources, processes and transforms it, and then directs it to Elasticsearch or other destinations. Logstash plays a significant role in data collection, processing, and transformation stages. With Logstash, it is possible to organize, filter, enrich, and convert data into different formats.
Kibana
3. Kibana: Kibana is used to visualize, analyze, and share data from Elasticsearch. Through Kibana, users can discover data, create diverse visual elements, and build dashboards to effectively present information.
When these three components come together, organizations can collect, process, analyze, and visualize their data. ELK Stack can be employed for handling various data types such as application logs, network logs, text documents, performance metrics, and more. Moreover, the flexible nature of ELK Stack enables the creation of customized solutions and addressing unique data analysis needs.
Installation and Configuration of ELK Stack (Elasticsearch, Logstash, Kibana) on Windows Server can be achieved through the following steps:
1: Java Installation:
Java is required to run Elasticsearch and Logstash. I recommend using OpenJDK instead of the official Oracle JDK. Follow the steps to download and install OpenJDK.
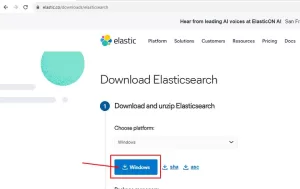
2: Elasticsearch Download and Installation:
2.1. Download the suitable version of Elasticsearch for Windows from the official Elasticsearch website: https://www.elastic.co/downloads/elasticsearch
elasticsearch
Extract the downloaded compressed file to a folder.
2.2. Configuration File (elasticsearch.yml):
The configuration file for Elasticsearch is located in the “config” folder.
Open the “elasticsearch.yml” file with a text editor.
Make the necessary configurations.
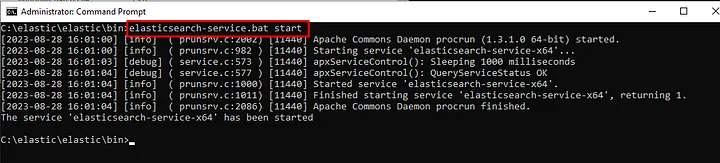
2.3. Starting Elasticsearch as a Service:
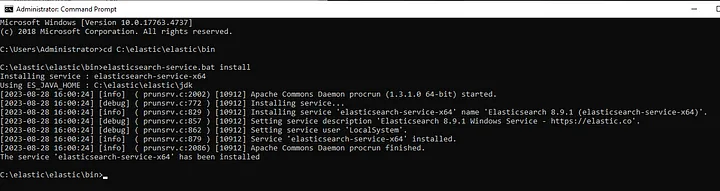
To run Elasticsearch as a Windows service, locate the “elasticsearch-service.bat” file in the “bin” folder.
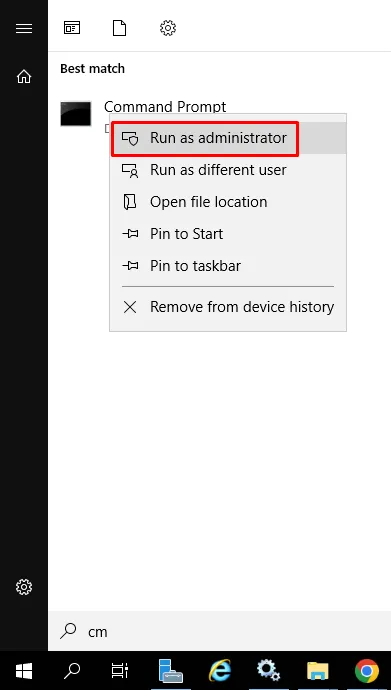
Open the command prompt as an administrator (right-click and select “Run as administrator”) and navigate to the relevant directory.
Use the command elasticsearch-service.bat install to register Elasticsearch as a service.
Then, start the Elasticsearch service using the command elasticsearch-service.bat start.
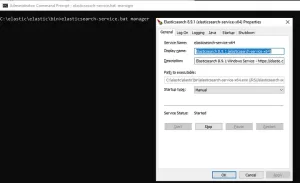
You can stop or manage the service using the command elasticsearch-service.bat manager.
2.4. After these steps, check whether the Elasticsearch service is installed and running:
Go to Start > Run > services.msc, and verify that the Elasticsearch service is installed and running.
3.2. Extract the downloaded compressed file to a folder.
3.3. Configuring Logstash via logstash.yml:
Logstash is configured through the “logstash.yml” file, typically located in the “config” subdirectory within the Logstash installation directory. In the configuration file, you can set up input, filter, and output settings. Additionally, you define the pipeline processing logic here.
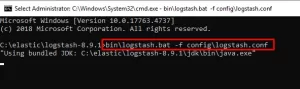
3.4. Running Logstash:
To run Logstash, open the command prompt, navigate to the Logstash installation directory, and use the following command to start Logstash:
4.2. Extract the downloaded compressed file to a folder.
4.3. Configure Kibana: Edit the Kibana configuration file (kibana.yml) to make your configurations (e.g., Elasticsearch connection settings, etc.).
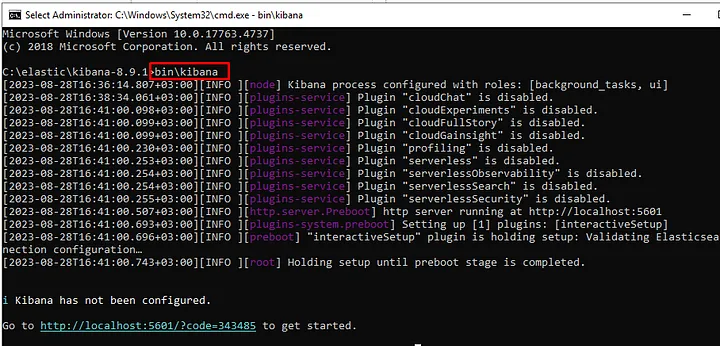
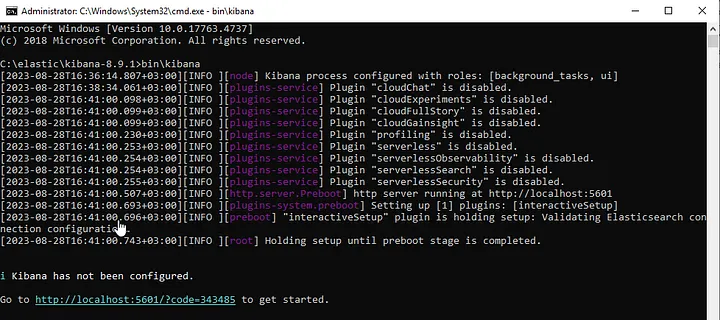
4.4. Running Kibana: Open the command prompt, navigate to the Kibana installation directory, and use the following command to start the service:
bin\kibana
Installation is complete, now we move on to configuration settings:
Elasticsearch’s security features can vary depending on the version of Elasticsearch you are using. Starting from version 6.8.0, basic security features (Security) are enabled by default in Elasticsearch. These features include user authentication, role-based access control, and encryption.
In Elasticsearch 7.0.0 and later versions, there is a built-in “elastic” user with a default password. This user can be used for administrative tasks. The credentials for the default “elastic” user are as follows: Username: elastic, Password: A randomly generated password in these versions, printed to the console when Elasticsearch is started.
However, for security reasons, it’s highly recommended to promptly change this default password. It’s advised to replace the randomly generated password with a secure one as soon as Elasticsearch is started.
For the most up-to-date information about Elasticsearch versions and security features, you can refer to the official Elasticsearch documentation or other reliable sources. Security features can evolve over time, so checking the official Elasticsearch documentation is advisable for staying informed.
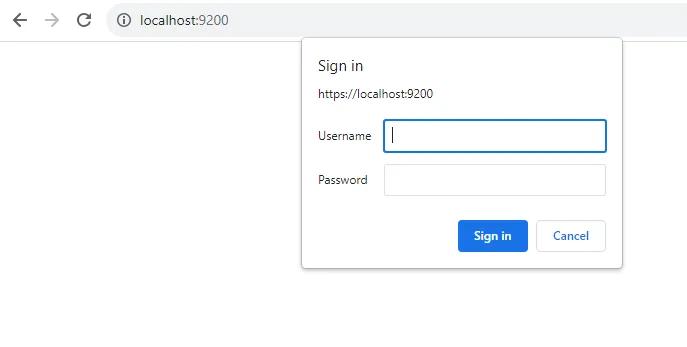
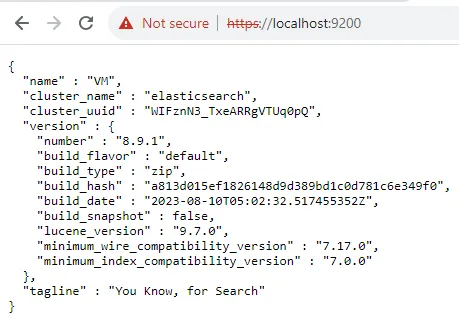
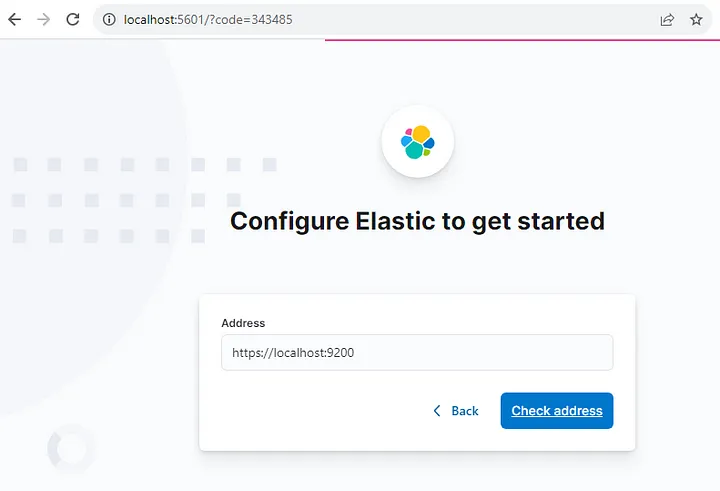
https://localhost:9200/
Username: elastic
Password: Enter the password that was generated during the initial installation, found in the “log” folder within the Elasticsearch directory.
Open your web browser and navigate tohttp://localhost:5601 . This address is the default location where Kibana operates.
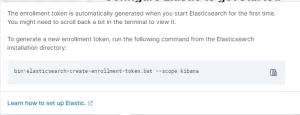
At this step, it requires you to generate a token.
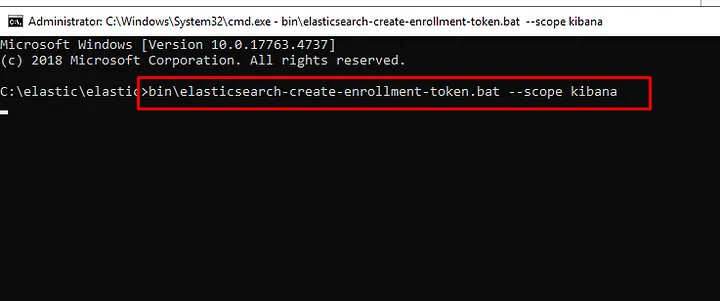
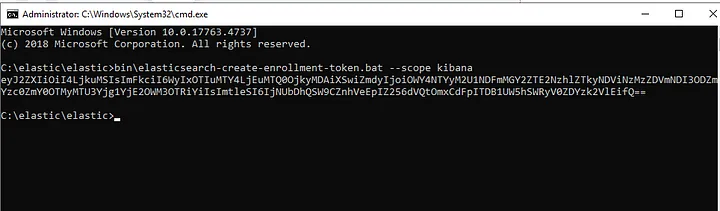
To generate the token, you need to run the relevant command in the command prompt.
bin\elasticsearch-create-enrollment-token.bat
bin\elasticsearch-create-enrollment-token.bat
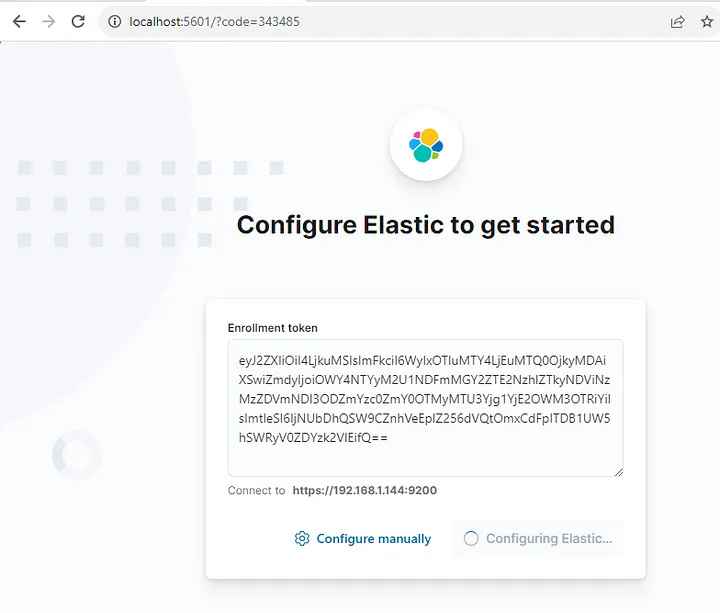
You add the code you generated to the Kibana panel.
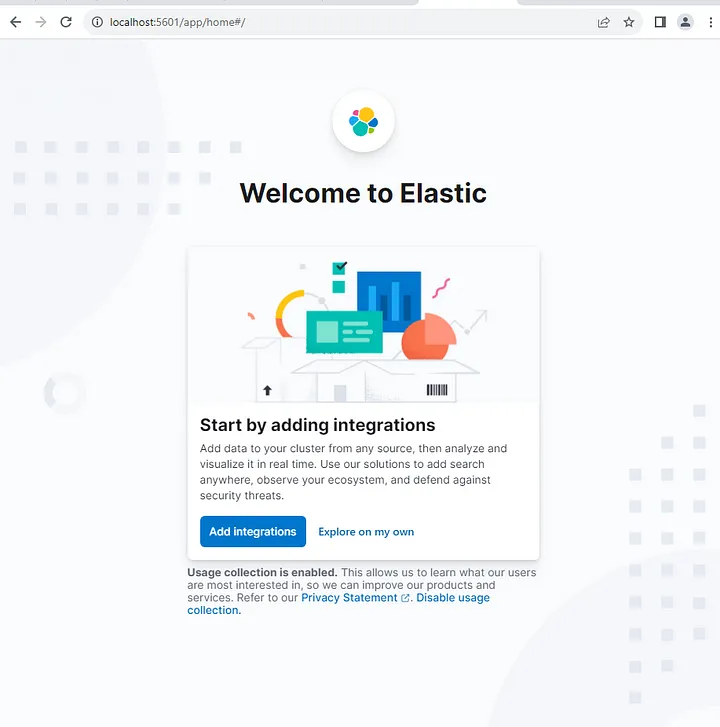
Kibana Panel
You establish the connection with the Elastic panel.
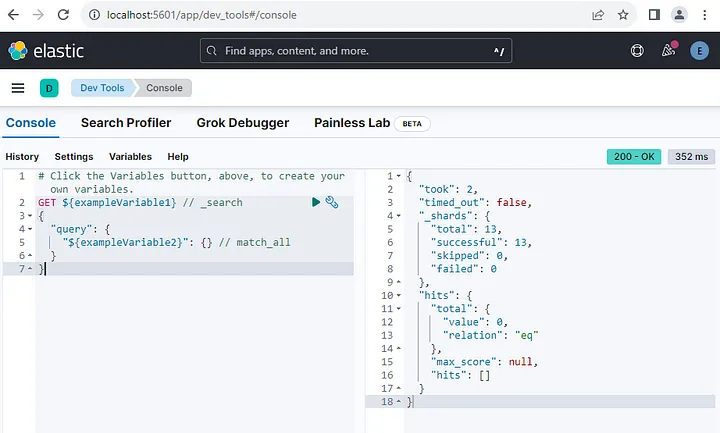
The configuration process for connecting Kibana with Elasticsearch is complete. Now, your ELK Stack connections are ready.
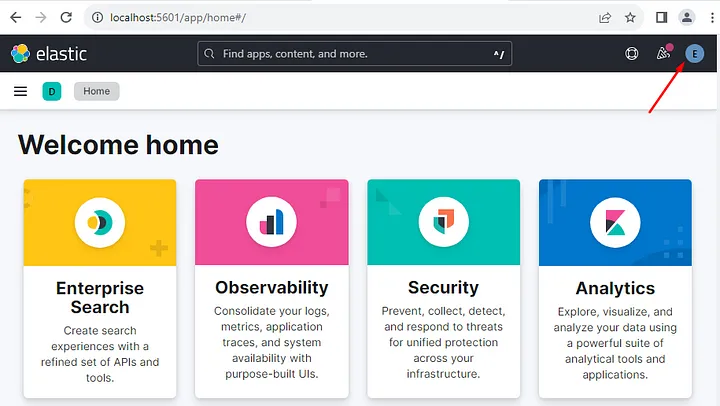
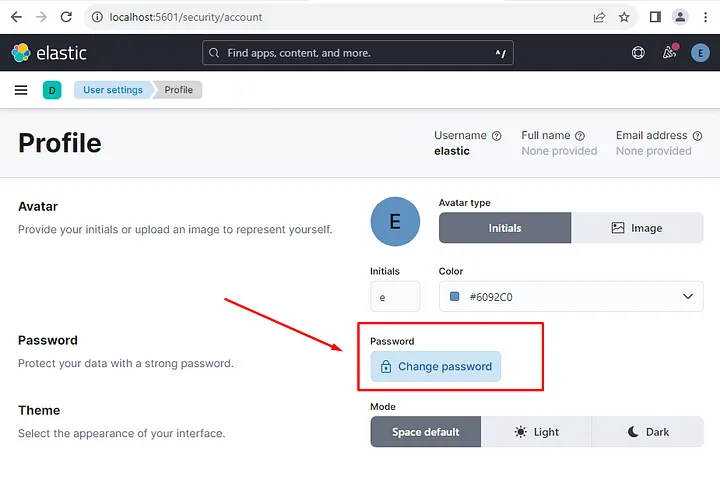
Since data security is crucial in our lives, remember to change the “default” password from the Kibana panel.
Select the “Edit Profile” option from the top right corner.
Edit Profile
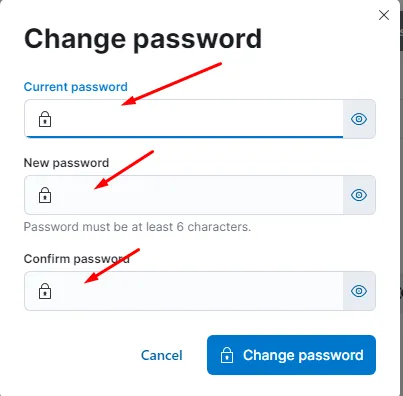
From the “Profile” section, select the “Change password” option.
Complete the process of changing the password by filling in the relevant fields.
By following these steps, you should have completed the installation and configuration of ELK Stack (Elasticsearch, Logstash, Kibana) on a Windows Server. Now, you can begin utilizing this powerful toolset for data analysis and visualization. ELK Stack will assist you in the processes of data collection, processing, analysis, and creating meaningful visuals.
Data security is of utmost importance, so remember to change the default passwords in Elasticsearch and Kibana to strong and unique passwords. This step will ensure the safety of your data.
If you encounter any challenges along the way, it’s a good idea to refer to the official documentation of Elasticsearch and Kibana or seek help from community support forums. Best of luck, and I wish you a successful journey filled with data insights!
If you have any questions or details you would like to add, feel free to write me.

 Alternative Step With Web.config File