
Office LTSC (2016, 2019, 2021) Installation Guide (No Login Required)
This guide will help you install Office LTSC 2016, 2019, and 2021 versions without needing to sign in, using the Office Deployment Tool (ODT). This method is specifically for Volume License keys.
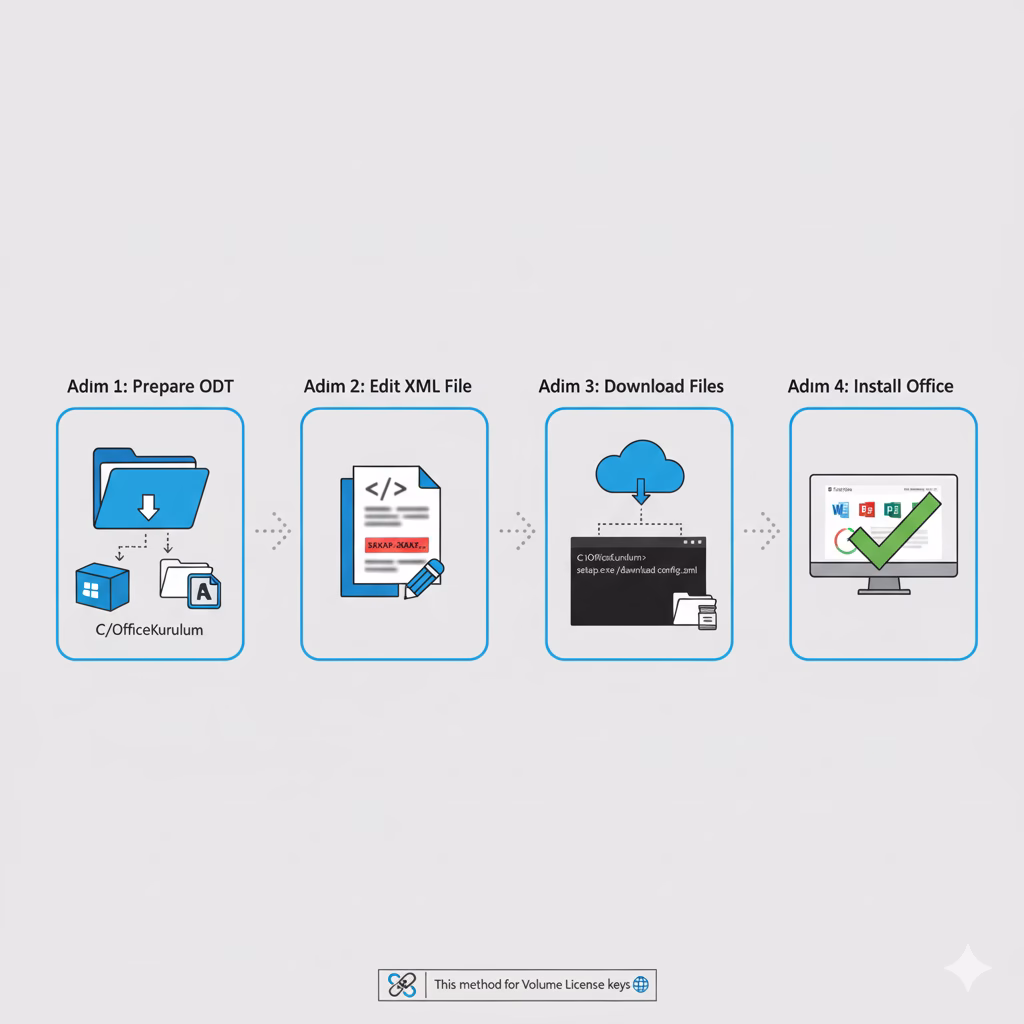
Step 1: Prepare the Office Deployment Tool (ODT)
- Download: Download the Office Deployment Tool from the official Microsoft site.
- Create Folder: Create an easily accessible folder on your computer (e.g.,
C:\OfficeKurulum). - Extract Files: Run the
officedeploymenttool.exefile you downloaded. When it asks where to extract the files, select theC:\OfficeKurulumfolder you created. - This folder should now contain the
setup.exefile and yourconfiguration-Office365-x64.xmlfile (or the file you are about to create).
Step 2: Edit the configuration-Office365-x64.xml File
This is the most critical step as it defines which version of Office you will install. Open your configuration-Office365-x64.xml file (located in C:\OfficeKurulum) with a text editor like Notepad.
Delete all existing content inside the file and paste one of the following code blocks, depending on the version you want to install.
IMPORTANT: You MUST replace PIDKEY="XXXXX-XXXXX-XXXXX-XXXXX-XXXXX" with your own 25-character product key for the specific version you are installing.
📦 Version 1: XML Code for Office LTSC Professional Plus 2021
XML
<Configuration>
  <Add OfficeClientEdition="64" Channel="PerpetualVL2021">
    <Product ID="ProPlus2021Volume" PIDKEY="XXXXX-XXXXX-XXXXX-XXXXX-XXXXX">
      <Language ID="en-us" />
    </Product>
  </Add>
  <RemoveMSI />
  <Display Level="Full" AcceptEULA="TRUE" />
  <Property Name="AUTOACTIVATE" Value="1" />
</Configuration>
(Note: This installs 64-bit, US-English LTSC 2021 Pro Plus.)
📦 Version 2: XML Code for Office Professional Plus 2019
XML
<Configuration>
  <Add OfficeClientEdition="64" Channel="PerpetualVL2019">
    <Product ID="ProPlus2019Volume" PIDKEY="XXXXX-XXXXX-XXXXX-XXXXX-XXXXX">
      <Language ID="en-us" />
    </Product>
  </Add>
  <RemoveMSI />
  <Display Level="Full" AcceptEULA="TRUE" />
  <Property Name="AUTOACTIVATE" Value="1" />
</Configuration>
(Note: This installs 64-bit, US-English Office 2019 Pro Plus.)
📦 Version 3: XML Code for Office Professional Plus 2016
XML
<Configuration>
  <Add OfficeClientEdition="64" Channel="PerpetualVL2016">
    <Product ID="ProPlus2016Volume" PIDKEY="XXXXX-XXXXX-XXXXX-XXXXX-XXXXX">
      <Language ID="en-us" />
    </Product>
  </Add>
  <RemoveMSI />
  <Display Level="Full" AcceptEULA="TRUE" />
  <Property Name="AUTOACTIVATE" Value="1" />
</Configuration>
(Note: This installs 64-bit, US-English Office 2016 Pro Plus.)
Don’t forget to save and close the XML file.
Step 3: Download Installation Files
- Open Command Prompt (CMD) as Administrator:
- Click the Start menu and type
cmd. - Right-click on “Command Prompt” and select “Run as administrator”.
- Click the Start menu and type
- Navigate to Folder: In the black-and-white window that opens, navigate to your
C:\OfficeKurulumfolder. Type the following command and press Enter:cd C:\OfficeKurulum - Start the Download: Now, tell the ODT to download the files based on your XML file. Type the following command and press Enter:
setup.exe /download configuration-Office365-x64.xml - Wait: The command prompt will move to the next line and blink. It may look like nothing is happening, but the files are downloading in the background. This can take 5-15 minutes depending on your internet speed. You will see a new folder named “Office” appear inside your
C:\OfficeKurulumdirectory. The process is finished when the command prompt returns to theC:\OfficeKurulum>prompt.
Step 4: Install Office
- Once the files are downloaded, make sure you are still in the Administrator Command Prompt window.
- Type the following command and press Enter:
setup.exe /configure configuration-Office365-x64.xml - That’s it! An Office installation window will appear and begin the installation. When it’s finished, you can open an application like Word or Excel. It will not ask you to sign in, and if you entered your product key correctly in the XML file, Office should already be activated.