Categories
Articles Backups SQL Windows Server

How to Perform a Database Copy in SQL Server

Copying databases can often be quite useful, but knowing how to do it is crucial. In SQL Server, an easy way to copy a database is to use the “Database Copy Wizard.” Here’s how to do it using this wizard:

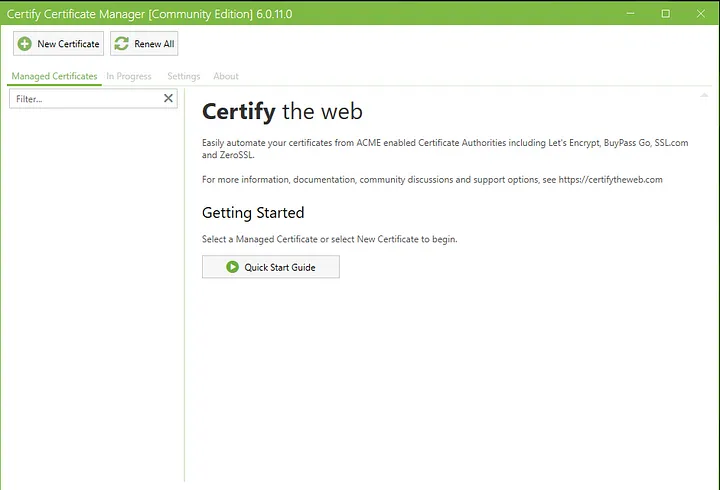
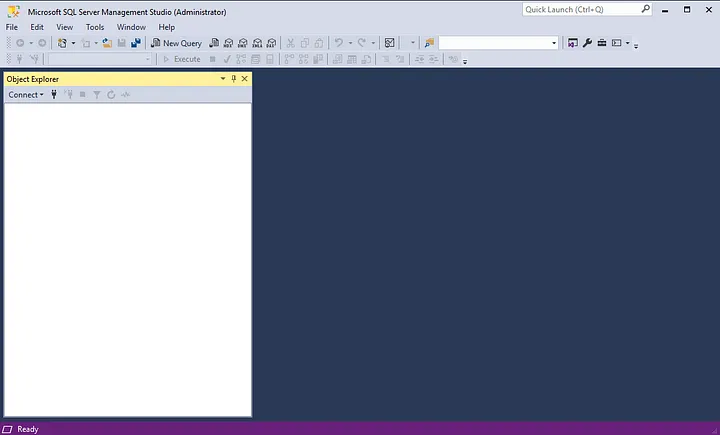
  1. First, open the SQL Server Management Studio (SSMS) application and connect to your SQL Server.

You can access the article where I previously explained the installation process from here.

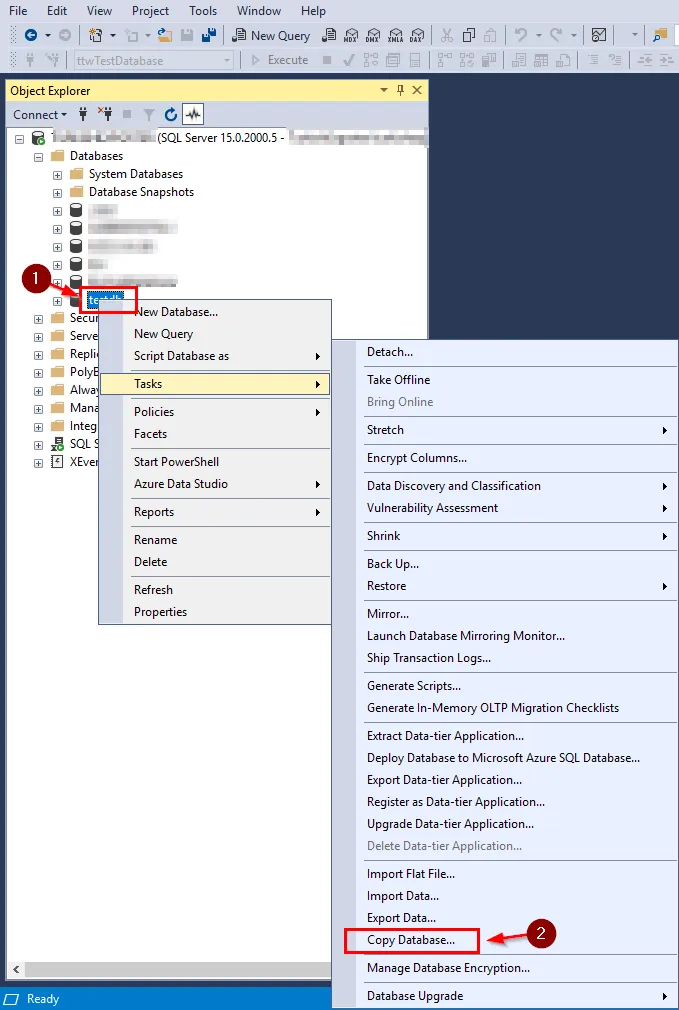
2. In the “Databases” tab on the left, locate the database you want to copy. This is the database you’ll be duplicating.

3. Now, right-click on it and select the “Tasks” option, then click on “Copy Database” to start the Database Copy Wizard.

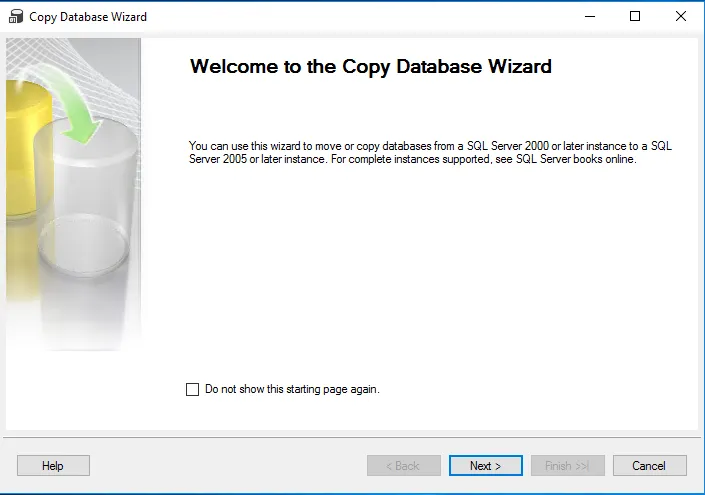
4. On the wizard’s initial screen, you’ll see the “Welcome to the Copy Database Wizard” message. Click “Next” to proceed.

5. On the “Select a Source Server and Database” screen, enter the name of your source SQL Server instance and, if necessary, provide authentication credentials. Then, choose the database you want to copy.

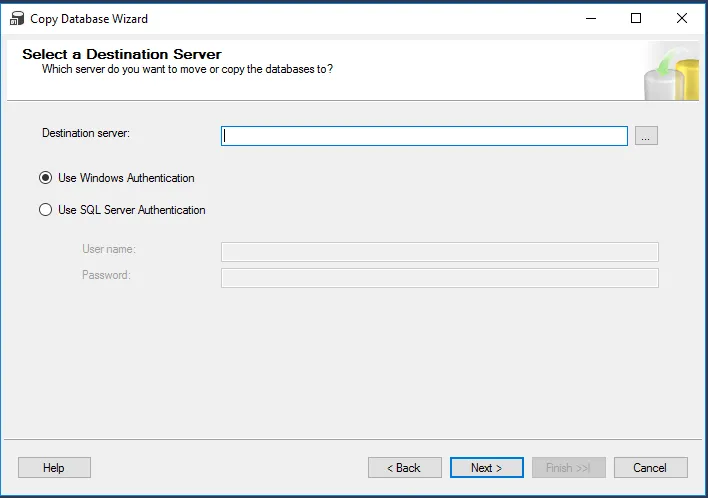
6. On the “Select a Destination Server and Database” screen, specify the name of your destination SQL Server instance and enter a new name for the copied database.

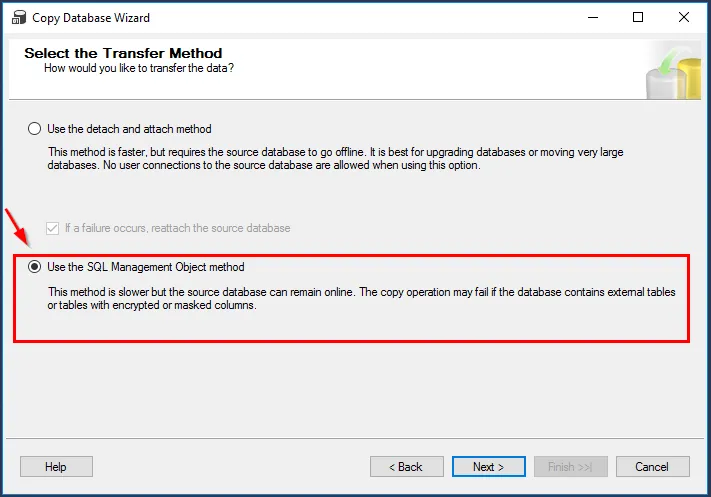
7. On the “Select Transfer Method” screen, you typically prefer to use the “Use the SQL Management Object method” option.

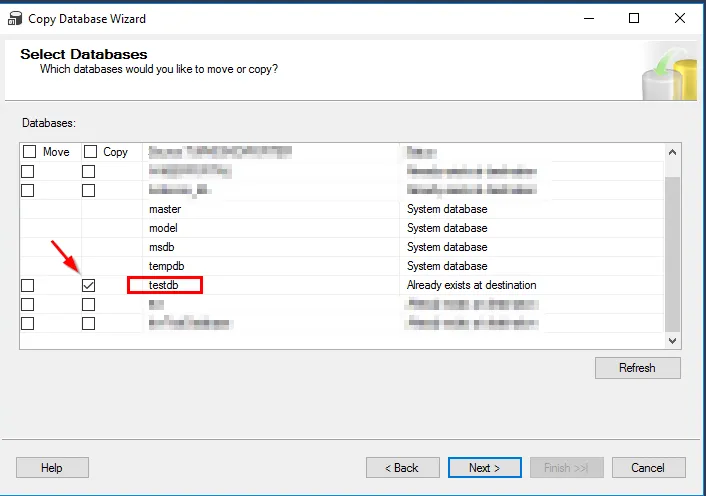
8. On the “Select Databases” screen, select the relevant database for the copy operation..

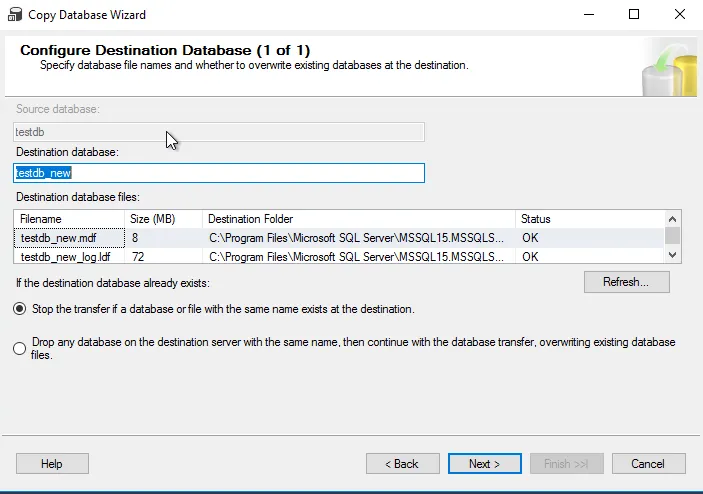
9. Next, on the “Configure Destination Database” screen, you can configure settings like database size, growth options, and other configurations.

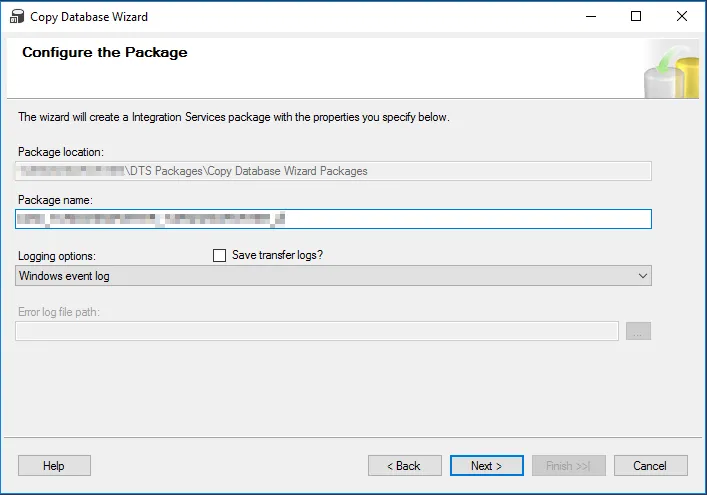
10. “Configure the Package” will create an Integration Services package with your specified settings.

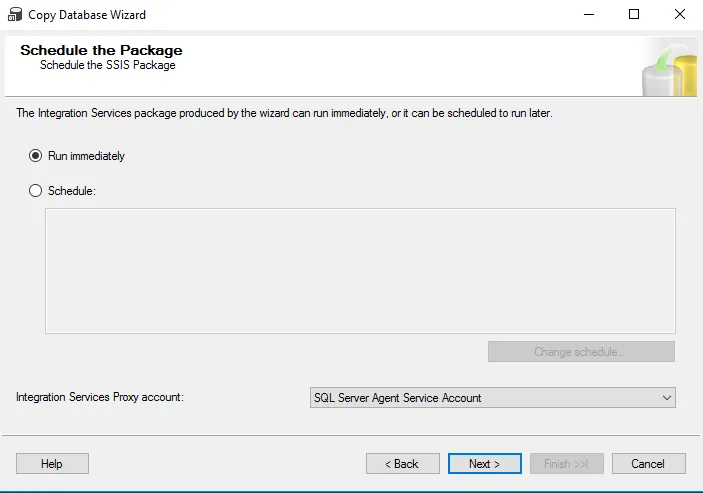
11. On the “Schedule and Start Copying” screen, you can choose to start the process immediately or create a scheduling plan.

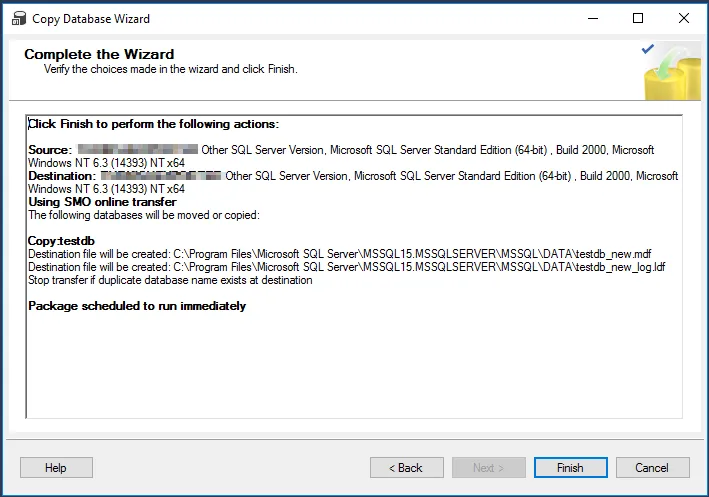
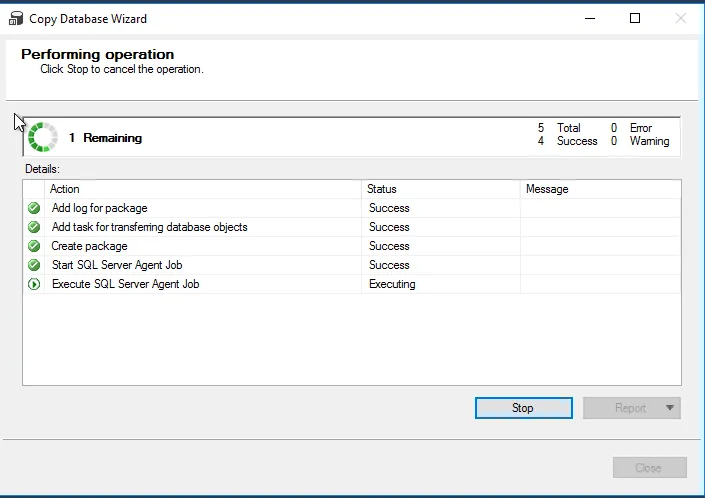
12. In the final step, review the operation and click “Finish” to initiate the database copying process.

This process can take some time depending on your settings and the database’s size. Once completed, the new database will be created on the destination server.

So, you’ve successfully copied your database!


If you have any questions or details you would like to add, feel free to write me.

Categories
Articles Windows Server

Creating and Using Your Website’s Robots.txt File — Optimizing Server Resource Consumption

A “robots.txt” file is a text document located in the root directory of your website that specifies which pages should or should not be indexed by web browsers and search engines. Here are the basic steps to create a robots.txt file:

1. Create a text file using a text editor and save it as “robots.txt

2. Edit the file’s content as follows:

User-agent: *
Disallow: /gizli/
Allow: /izinli/

In this example, the “*” (asterisk) represents a rule that applies to all search engines. The “Disallow” command specifies the directory you want to block, while the “Allow” command specifies the specific directories within the blocked directory that you want to permit indexing. In this case, “/private/” is blocked, and “/public/” is allowed for indexing by search engines.

3. Upload the robots.txt file to the root directory of your website. It should be accessible at the end of your website’s main URL (e.g., “https://ahmetorhan.com/robots.txt“).

4. To verify the changes, you can access Google Search Console or the webmaster tools of other search engines.


Now, let’s examine the example below:

User-agent: Googlebot
Disallow:

User-agent: AdsBot-Google
Disallow:

User-agent: Googlebot-Image
Disallow:

User-agent: yandex
Disallow:

User-agent: uptimebot
Disallow:

User-agent: Amazonbot 
Disallow: /do-not-crawl

User-agent: PetalBot
Disallow: /

User-agent: Applebot
Disallow: /not-allowed/

User-agent: GPTBot
Disallow: /

An example robots.txt file contains rules for blocking or allowing directories specific to different user agents (web browser robots). Let’s examine this example in detail:

  1. `User-agent: Googlebot`
  • This rule is for Googlebot. It targets Google’s web crawling robot.
  • It does not block any directories, meaning all pages can be indexed.

2. `User-agent: AdsBot-Google`

  • This rule is for Google AdsBot. It targets the robot used for Google’s advertising services.
  • It does not block any directories, so all pages can be indexed.

3. `User-agent: Googlebot-Image`

  • This rule is for Googlebot-Image. It targets Google’s image crawling robot.
  • It does not block any directories, allowing all images to be indexed.

4. `User-agent: Yandex`

  • This rule is for Yandex. It targets Yandex’s search engine robot.
  • It does not block any directories, meaning all pages can be indexed.

5. `User-agent: uptimebot`

  • This rule is for uptimebot, a robot responsible for checking the uptime of a specific service.
  • It does not block any directories, allowing all pages to be indexed.

6. `User-agent: Amazonbot`

  • This rule is for Amazonbot. It targets Amazon’s proprietary robot.
  • It blocks the “/do-not-crawl” directory, preventing pages in this directory from being indexed.

7. `User-agent: PetalBot`

  • This rule is for PetalBot. It targets Huawei’s Petal Search engine’s robot.
  • It blocks all directories, preventing all pages from being indexed.

8. `User-agent: Applebot`

  • This rule is for Applebot. It targets Apple’s search engine robot.
  • It blocks the “/not-allowed/” directory, preventing pages in this directory from being indexed.

9. `User-agent: GPTBot`

  • This rule is for GPTBot, targeting it.
  • It blocks all directories, preventing all pages from being indexed.

In conclusion, by making adjustments in the “robots.txt” file, you can effectively mitigate unnecessary resource consumption on your web server and associated database servers. You can also ensure that the most relevant bots are allowed, leading to more accurate results.


If you have any questions or details you would like to add, feel free to write me.

Categories
Articles Windows Server

Installing IIS on Windows Server

You can install IIS (Internet Information Services) on Windows Server using Server Manager by following the steps below:

1. Server Preparation:
— Make sure you have Administrator privileges on your server if you are using a Windows Server operating system.

2. Opening Server Manager:
— Click on the Start button.

— Search for “Server Manager” and open it.

3. Select “Add Roles and Features” from the Left Menu:
— In the Server Manager main window, locate “Upper Banners” and select “Add Roles and Features.”

4. Launch the “Add Roles and Features Wizard”:
— The “Add Roles and Features Wizard” window will open. This wizard helps you add roles and features to your server.

5. Select Features:
— In the first step of the wizard, choose the “Installation Type.” Typically, select “Role-based or feature-based installation,” and proceed.

6. Choose the Target Server:
— Select your server or specify the target server, then click “Next.”

7. Select Roles:
— In the “Roles” section, find “Web Server (IIS)” and check the box. You can also select additional components if needed.

8. Review Accessibility Information:
— Follow the wizard’s progression and configure necessary options when prompted.

9. Initiate the Installation:
— Start the IIS installation by clicking the “Install” button.

10. Completion of Installation:
— Once the installation is complete, you will receive a confirmation message indicating successful installation.You will then be prompted for a reboot.

You can successfully install IIS by following these steps. Afterward, you can configure your websites and applications using the IIS Management Console.


If you have any questions or details you would like to add, feel free to write me.

Categories
Articles Windows Server

Obtaining an SSL Certificate on Windows IIS Server Using “Certify the Web”

One of the crucial steps towards securing data traffic on the internet is to use SSL/TLS certificates on your websites. These certificates ensure encrypted data transmission and enable users to interact with your site securely. For Windows-based IIS servers, you can utilize the free tool “Certify the Web” to acquire and manage SSL certificates. Here’s a step-by-step guide on how to obtain an SSL certificate using the Certify the Web tool:

Step 1: Downloading and Installing Certify the Web

  1. Visit the official Certify the Web website and download the program. Proceed with the installation on your computer.
Certify the Web — 01
Certify the Web — 02
Certify the Web — 03
Certify the Web — 04

Step 2: Opening the Tool and Basic Configuration

1.Launch the Certify the Web application.

Certify the Web — 05

2. On the main screen, you’ll typically find an option like “New Certificate” or something similar. Click on this option to initiate the process of creating a new certificate.

Certify the Web — 06
Certify the Web — 07

Step 3: Domain Selection and Verification Methods

1.During the certificate creation process, you should add the domain names you wish to protect (e.g., www.example.com).

Certify the Web — 08

2.Certify the Web offers various methods to verify the ownership of your domain. Choose one of these methods. Usually, you can opt for HTTP or DNS-based verification methods.

HTTP-Based Verification:

  1. When HTTP-based verification is selected, Certify the Web will automatically create a special file in a designated folder on your server. This file is used to verify that your domain is accessible.

DNS-Based Verification:

  1. If DNS-based verification is chosen, you might need to create a specific DNS record. This record assists the certificate provider in verifying the ownership of your domain.

Step 4: Certificate Issuance and Installation

1.Once the verification process is completed, Certify the Web will automatically obtain the SSL/TLS certificates.

2.To manage the generated certificates and install them on your IIS server when needed, you can use the “Certificates” or a similar tab or menu.

IIS Server
IIS Server
IIS Server / Server Certificates

Step 5: Using the Certificate on the IIS Server

1.While Certify the Web handles the certificate issuance, you need to activate these certificates on your IIS server.

2.In the IIS management interface, navigate to the connection security settings of the relevant website.

IIS Server — Binding

3.Select the newly acquired SSL/TLS certificate as the server certificate.

Site Binding
Site Binding
Edit Site Binding
Edit Site Binding

Data security is a paramount concern while managing your online presence. The Certify the Web tool simplifies the process of SSL certificate acquisition and management by making it easy and automated.


If you have any questions or details you would like to add, feel free to write me.

Categories
Articles Monitoring Windows Server

Resetting Grafana Password on Windows Server

1. Download the Grafana Password Reset Tool:

The first step is to download the official Grafana password reset tool. This tool is typically included with the Grafana installation. You can download it from the following link:

Grafana Password Reset Tool

2. Run It in the Command Prompt:

  • Navigate to the directory where Grafana is installed:

  • Run the Command Prompt as an administrator.

  • o to the relevant directory.

3.Execute the Command:

  • You can reset the Grafana password by using the following command:
Grafana-cli admin reset-admin-password YENI_SIFRE
  • Replace `NEW_PASSWORD` with your new password.

4. Log In with the New Password:

Once the password reset process is complete, you can log in to Grafana with your new password.


If you have any questions or details you would like to add, feel free to write me.