Categories
Articles SQL

Index Maintenance in SQL Server: Determining REORGANIZE and REBUILD Operations

The concept of using SQL queries to determine and rectify the fragmentation rates of indexes is quite important. This query serves as a useful tool to understand how indexes require maintenance for improving the performance of databases. I will explain the process of using the provided SQL query to check index fragmentation rates and perform necessary corrections when needed.

SQL Query:

SELECT S.name as 'Schema',
T.name as 'Table',
I.name as 'Index',
DDIPS.avg_fragmentation_in_percent,
DDIPS.page_count
FROM sys.dm_db_index_physical_stats (DB_ID(), NULL, NULL, NULL, NULL) AS DDIPS
INNER JOIN sys.tables T on T.object_id = DDIPS.object_id
INNER JOIN sys.schemas S on T.schema_id = S.schema_id
INNER JOIN sys.indexes I ON I.object_id = DDIPS.object_id
AND DDIPS.index_id = I.index_id
WHERE DDIPS.database_id = DB_ID()
and I.name is not null
AND DDIPS.avg_fragmentation_in_percent > 0
ORDER BY DDIPS.avg_fragmentation_in_percent desc

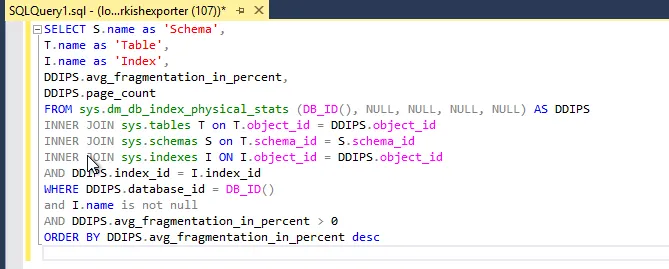
This SQL query will list the fragmentation rates and page counts of indexes in the current database. Understanding the extent of index fragmentation is crucial because it helps us determine how to rectify them.

Subsequently, the results of this query can be copied into an Excel table, and the following Excel formula can be used to automatically generate index correction queries:

=EĞER(D2>10;BİRLEŞTİR("ALTER INDEX ";C2;" ON ";B2;" ";EĞER(D2<30;"REORGANIZE";"REBUILD");" WITH(ONLINE=ON)";"");"")

This Excel formula automatically generates ALTER INDEX queries based on the index fragmentation percentage. If the index fragmentation percentage is greater than 10 and less than 30, the REORGANIZE operation is applied; otherwise, the REBUILD operation is applied.

This concept in the article will assist database administrators in automating index maintenance in SQL Server or similar database systems, thereby enhancing database performance. Regular index maintenance is a critical step in optimizing database performance.


How REORGANIZE and REBUILD Operations are Determined in SQL:

In SQL Server, the “REORGANIZE” and “REBUILD” operations for index maintenance are determined based on the degree of index fragmentation and the needs of the database. Here are the factors that influence this decision:

1. Index Fragmentation Rate (avg_fragmentation_in_percent): The fragmentation rate of indexes is a critical metric that indicates how fragmented an index is. The fragmentation rate is automatically calculated by SQL Server and can be obtained using the `sys.dm_db_index_physical_stats` function. Typically, it is determined using the following rules:

  • If the fragmentation rate is between 0–10%, the index is considered normal.
  • If the fragmentation rate is between 10–30%, a “REORGANIZE” operation may be applied.
  • If the fragmentation rate is above 30%, a “REBUILD” operation may be required.
  1. These operations are designed to optimize index performance and, ultimately, the performance of the database. The choice between “REORGANIZE” and “REBUILD” depends on the specific fragmentation level and the database’s performance requirements.
  2. “Database Load and Usage Patterns: The load and usage patterns of a database also influence index maintenance. If a database experiences heavy write operations or a high volume of transactions, caution should be exercised during maintenance. In such cases, the ‘REORGANIZE’ operation may be preferred because it is a lighter process. The ‘REBUILD’ operation is more aggressive and resource-intensive, necessitating careful planning.
  3. Database Size and Resources: The size of the database and the available resources impact maintenance decisions. The ‘REBUILD’ operation requires more resources, potentially leading to longer execution times, which can have a greater impact on your resources in the case of large databases. For smaller databases, the ‘REBUILD’ operation may pose fewer concerns.
  4. Database Criticality: The criticality of the database determines the allocation of time and resources for maintenance tasks. Maintenance operations for critical databases should be planned more meticulously.
  5. Operating System and Hardware: The allocation of operating system and hardware resources to the database is also crucial. If you have more powerful hardware, you may opt for the ‘REBUILD’ operation more frequently.

These are fundamental factors to consider when determining the ‘REORGANIZE’ and ‘REBUILD’ operations for index maintenance. Every database is unique and may have specific requirements, so maintenance operations should be tailored to the needs of your database. Ideally, index fragmentation rates should be monitored at regular intervals, and maintenance operations should be planned in alignment with your database management policies.”


Here’s the explanation of the SQL code:

1.SELECT Statement: This statement specifies which columns will be included in the result set. Below are the names of the columns to be used, along with some of them having alias names:

  • S.name as 'Schema': A column representing the schema name, with the alias name ‘Schema’.
  • T.name as 'Table': A column representing the table name, with the alias name ‘Table’.
  • I.name as 'Index': A column representing the index name, with the alias name ‘Index’.
  • DDIPS.avg_fragmentation_in_percent: A column representing the average fragmentation percentage.
  • DDIPS.page_count: A column representing the page count.

2.FROM Clause: This clause specifies the source from which data will be retrieved. In this query, the sys.dm_db_index_physical_stats function is used to obtain the physical statistics of the indexes in the database.

  • sys.dm_db_index_physical_stats (DB_ID(), NULL, NULL, NULL, NULL) AS DDIPS: This function returns the physical statistics of the indexes in the database. DB_ID() retrieves the identity of the current database. AS DDIPS is an alias given to this result set.

3.INNER JOIN Statements: These statements are used to join the data. In the query, the results of sys.tablessys.schemas, and sys.indexes tables are combined with the results of sys.dm_db_index_physical_stats. This allows the relevant table, schema, and index information to be brought together.

4.WHERE Clause: This clause is used to filter the query results. In this query, only indexes that meet specific conditions are included. For example, it selects indexes where the fragmentation rate is greater than 0 and where the index is not null.-

5.ORDER BY Clause: This clause determines how the results are sorted. The query results are ordered from highest to lowest based on the fragmentation percentage, meaning the most fragmented indexes are listed first.


If you have any questions or details you would like to add, feel free to write me.

Categories
Articles Firewall

Configuring SIP Settings for IP PBX with FortiGate (Fortinet) CLI Guide

IP PBX Systems: Empowering Digital Communication

In today’s business landscape, the pursuit of smarter and more flexible communication solutions is paramount. IP PBX systems offer a modern communication infrastructure compared to traditional phone systems. Leveraging Internet Protocol (IP), these systems enable efficient and cost-effective communication by transmitting voice over the internet.

FortiGate (Fortinet) CLI Configuration for IP PBX: Prioritize Backup!

Efficient operation of IP PBX systems necessitates meticulous security and management. The FortiGate CLI interface aids in configuring your IP PBX while ensuring network security. However, before embarking on any configurations, it is imperative to remember:

  • The provided commands serve as examples and may vary based on your FortiGate device’s version.
  • CLI usage directly impacts your device’s configuration; therefore, exercise caution.
  • Always back up your configuration before initiating any changes. This safeguards your data in case of unexpected issues.

Configuring SIP Settings for IP PBX Using FortiGate (Fortinet) CLI
FortiGate (Fortinet)

To configure SIP settings for IP PBX using the FortiGate CLI:

Step 1: Disable SIP Helpers and Monitoring Settings

config system settings
set sip-helper disable
set sip-nat-trace disable
set default-voip-alg-mode kernel-helper-based
end

Step 2: Managing and Deleting Session Helpers:

config system session-helper
show
delete 13 # Burada 13, silmek istediğiniz oturum yardımcısının numarasını temsil eder. Doğru numarayı belirttiğinizden emin olun.
end

Step 3: Creating VoIP Profiles and Configuring RTP Settings

config voip profile
edit default
config sip
set rtp disable
end

After these steps, you should restart the device. You can use the following code for that purpose.

execute reboot


Please note that the provided commands are illustrative and may differ based on your FortiGate device’s version. CLI usage directly influences your device’s configuration, making careful execution crucial. Always remember to back up your configuration before making any changes.


If you have any questions or details you would like to add, feel free to write me.

Categories
Articles Cloudflare

How to Add a Domain for Free, Get an SSL Certificate, and Set Up DNS Forwarding with Cloudflare?

How to Add a Domain for Free, Get an SSL Certificate, and Set Up DNS Forwarding Using Cloudflare for Free?

1.Creating a Cloudflare Account: If you don’t have a Cloudflare account, go to cloudflare.com and create an account.

2.Adding a Site on Cloudflare: After logging into your account, go to the Cloudflare control panel and click on the ‘Add a Site’ option. Then, enter the domain name of your site.

3.Choosing a Plan: Cloudflare offers different service levels. The free plan provides basic services, but if you want more features, you can upgrade to paid plans. In this step, we are selecting the free plan.

4.Verifying DNS Records: After adding the domain name, Cloudflare automatically analyzes your DNS records. In this step, ensure that your existing DNS records are correct. Edit them if necessary.

  • We proceed by saying continue this step to edit later.

  • We accept a warning about adjusting DNS settings and continue.

  • At this stage, our Cloudflare dns information comes. To do this, you need to change the DNS routing from the domain provider as follows. (This field may vary depending on the domain providers.)

5.DNS Forwarding: Cloudflare is used to manage your DNS forwarding. To forward your DNS records, go to the Cloudflare control panel. Click the “DNS” tab on the home page. Here, we will add new DNS records.

  • We continue by clicking Add Record. We will add Host A and CName as necessary.
HOST A
HOST A
CNAME
CNAME

NOTE: After changing your DNS settings, it may take several hours for these changes to propagate throughout the internet. Once the DNS records are updated worldwide, your site will start serving via Cloudflare.

6.Adding an SSL Certificate: Cloudflare provides a free SSL/TLS certificate. To enable this certificate, go to the “SSL/TLS” tab in the Cloudflare control panel. Next, enable “Full” or “Flexible” SSL mode.
  • You can also check whether it has received SSL from the Edge Certificates section.

7.Test and Monitor: Test your site to make sure everything is working properly. Cloudflare control panel provides detailed information about site traffic.

…and happy ending 🙂

In summary; We can add DNS redirects and SSL to our existing domain name free of charge via Cloudflare.


If you have any questions or details you would like to add, feel free to write me.

Categories
Articles Cloudflare

Adding a Domain to Yandex Mail and Configuring Email Settings with Cloudflare

Let’s get started with adding a domain to Yandex Mail and configuring email settings with Cloudflare.

1.Create Your Yandex Mail Account:

If you don’t already have a Yandex Mail account, create one.

2.Adding a Domain:

Log in to your Yandex Mail account.

  • Next, go to your account settings and locate the “Manage” and “Domains” options.

3. Add a Domain:

  • Click on the “Add Domain” or “Add Domain” option.
  • Enter your domain name and add it. Yandex may ask you to verify your domain.

4. Create Your Cloudflare Account:

5. Transfer Domain Settings to Cloudflare:

  • Log in to your Cloudflare account.

  • Add your domain to Cloudflare by selecting the “Add Site” option.

  • Then, use the Cloudflare DNS (Domain Name System) manager to configure your DNS records.

6. Configure DNS Settings:

  • To add the necessary DNS records for Yandex Mail, go to the DNS management section in your Cloudflare account.

  • Below are the basic DNS records and settings that you will add in the Cloudflare DNS section following the instructions after adding your domain in the Yandex Mail panel:
  • Return to your Yandex Mail account.
  • When you’ve added the domain, Yandex may ask you to verify your DNS records. Proceed with this verification.

— Follow the instructions provided by Yandex Mail for verification.

— In the Cloudflare DNS “Records” section, follow the steps below and save the TXT record.

—  Afterward, verify it in the Yandex Mail panel.

  • MX (Mail Exchange) Record: This record contains the server address that directs email delivery. Use the values specified by Yandex for Yandex Mail’s MX records.

— Perform the following additions on the Cloudflare panel.

  • DKIM (DomainKeys Identified Mail) Record: DKIM records authenticate the identity of your emails. Use the DKIM settings specified by Yandex Mail for Yandex Mail.


— Perform the following additions on the Cloudflare panel.

  • SPF (Sender Policy Framework) Record: The SPF record verifies email sending permissions. Use the SPF record settings specified by Yandex Mail for Yandex Mail.

— Perform the following additions on the Cloudflare panel.


By following these steps, you can add a domain to Yandex Mail and configure your DNS settings through Cloudflare. If you encounter any issues related to email, you can reach out to the support teams of Yandex Mail or Cloudflare for assistance.


If you have any questions or details you would like to add, feel free to write me.

Categories
Access Point Articles

Increasing UniFi Access Point (AP) Speed Beyond 100 Mbps

You can enhance the bandwidth speed of your UniFi Access Point (AP) beyond 100 Mbps by configuring AP radios settings through the UniFi Network application or the UniFi Controller interface. Follow the steps below to achieve this:

1.Access UniFi Controller: Open the UniFi Controller and log in to the relevant site.

UniFi Controller
UniFi Controller

2.Navigate to Devices Section: Click on the “Devices” section in the left-hand menu.

Devices
Devices

3.Select the Access Point (AP): Choose your UniFi Access Point from the list.

UniFi Access Point
UniFi Access Point

4.Go to Settings Section: On the detailed page of the selected Access Point, click on the “Settings” tab and configure the Radios sections under it as follows:

2.4 GHZ Radio
Channel width : HT20
Channel : 11
Transmit Power : Medium

5 GHZ Radio
Channel width : VHT80
Channel : 36
Transmit Power :High

Setting (Radio)
Setting (Radio)

5.Save the Changes Made: After configuring the settings, save the changes by clicking “Apply Changes” at the bottom of the page.

Apply Changes
Apply Changes
save
save

6.Perform Speed Test: You can now connect to the relevant SSID and perform a speed test.

speedtest
speedtest

7.Restart the Access Point (If Needed): If the changes don’t take effect immediately, restart the Access Point. Under the “Setting” section, navigate to the “Management” tab and choose “Restart Device.”

Restart Device
Restart Device

By following these steps, you can elevate your UniFi AP’s bandwidth speed beyond 100 Mbps, optimizing performance and ensuring a better wireless network experience. Carefully configure the settings to achieve the desired speeds.

Please note that the provided translation may have some variations based on context and terminology preferences.


If you have any questions or details you would like to add, feel free to write me.